Paid zoom access, powered by your website
Sell member-only Zoom video calls from your website. Offer free, paid members-only, of single payment access. Works on any platform, including WordPress, Squarespace, Wix, and more.
Pair Zoom with MemberSpace to host live calls, only accessible to paid attendees. Empower your sales with features that boost revenue, including:
- Sell content across tiers
- Google signup for members
- 1-click subscription payments
- Member pricing changes
- Trial periods for any plan
- Abandoned signup reminders
- Cancellation alternatives
- Real live support
Why Should You Charge for a Zoom Call?
Paid Zoom calls can take the place of in-person events like seminars, workshops, training sessions and masterminds. By moving your events onto Zoom, you can reach a wider audience, develop a new revenue stream, and build your brand as an expert.
Launching a paid Zoom call is a great way to teach your audience a new skill, without creating an entire course around the topic. (Of course, if you are an online course creator, paid Zoom calls are another great way to drum up interest in your more in-depth content offerings!)
Why Use Zoom?
There are a bunch of video calling apps on the market — but Zoom is a particularly good choice for creators who want to run a paid call!
- It’s free for creators and attendees to use
- Zoom works on every platform, including Android phones and iOS
- It offers a unique “breakout rooms” feature that lets you put your attendees in up to 50 small groups, allowing you to do the kind of small group work that might take place during an in-person event.
Benefits of Using MemberSpace for Paid Zoom Calls
MemberSpace makes the process of scheduling, protecting, and charging for a paid Zoom call very streamlined and simple. You don’t need to chase payments or attempt to cross-reference a list of attendees with transactions received through PayPal or Cash App. Instead, MemberSpace lets you collect payment up front via a secure online portal, and provide a Zoom link only to confirmed, paid registrants.
As an added benefit, you can manage all aspects of your online business through MemberSpace. You can create an online course, build a content library, launch a private podcast, create a paid community, sell eBooks, start a paid newsletter, and more all in one place. As your membership business grows, it’s easy to add new offerings or events at any time.
How to Start Charging for Zoom Calls
It’s easy! To get started, you need:
- A free Zoom account to host calls
- A free Stripe account to process payments
- A website built with a compatible CMS
- A MemberSpace plan
Step One: Create an Event Website
By using MemberSpace to sell access to paid Zoom calls, you can advertise your events right on your existing website. To do this, you’ll need to create two web pages:
A public landing page to advertise your new paid Zoom call.

A “secret” event page that is only visible to paid attendees. This page will provide details about the specific event they’ve signed up for.

When you set up your pages, you can nest them in a hierarchy. This is known as creating a subdirectory. For example:
Public: https://www.yourwebsite.com/events
Secret: https://www.yourwebsite.com/events/members-only-zoom
Make sure you install MemberSpace on your website before proceeding to the next step.
Step Two: Protect Your Website with MemberSpace
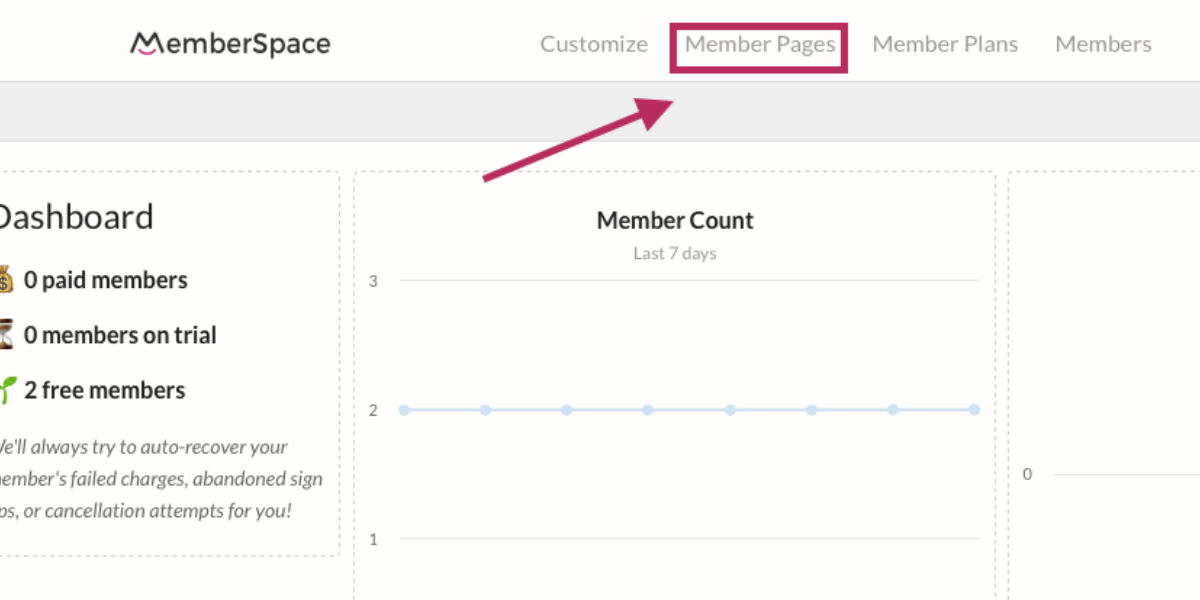
Log into your MemberSpace dashboard and click “Member Pages” at the top.
Grab the URL of your “secret” event page created in step one. Copy the slash after .com and everything that follows. Paste it into MemberSpace:
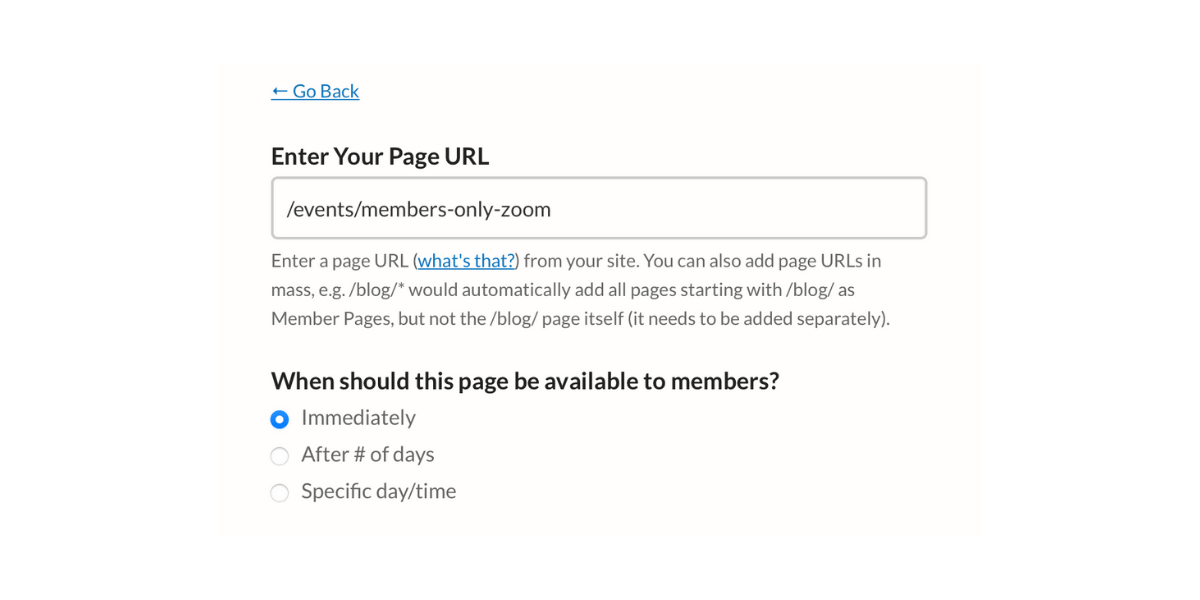
You can select when your attendees should be able to access the content — immediately or at a time you specify.
When you’re done, click the pink “Add Now” button and save your progress.
Step Three: Create a Payment Plan
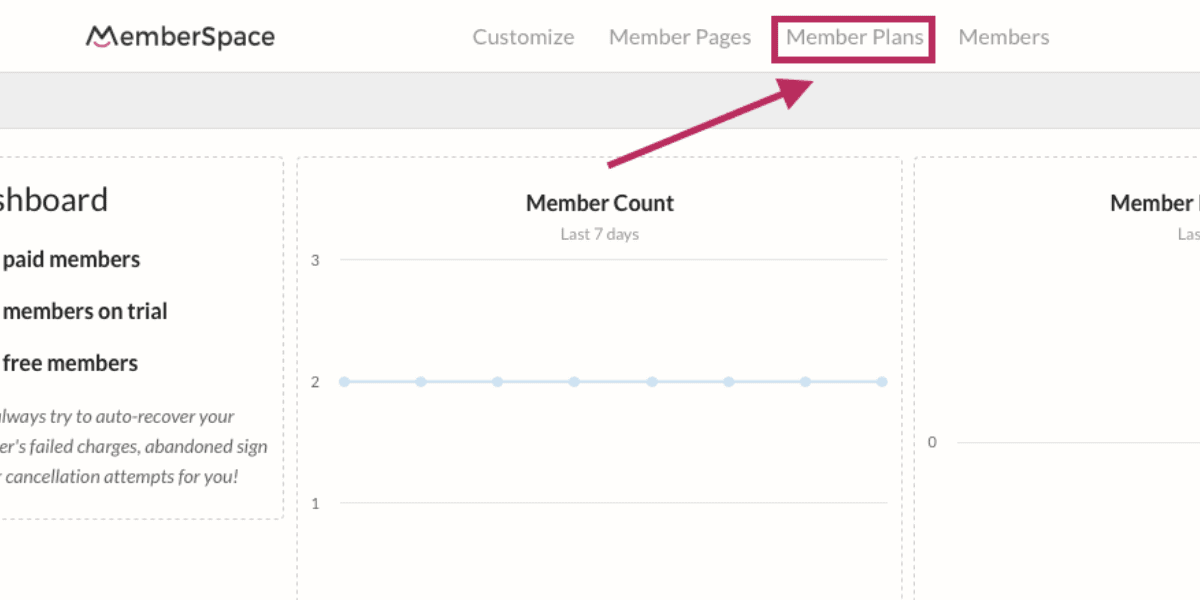
Go to the top of your MemberSpace dashboard and click “Member Plans.”
Next, click the pink “Create Member Plans” button and select a plan type from the drop-down menu. We’re charging for access to a single paid Zoom event, so we’ve selected “One Time Payment.”
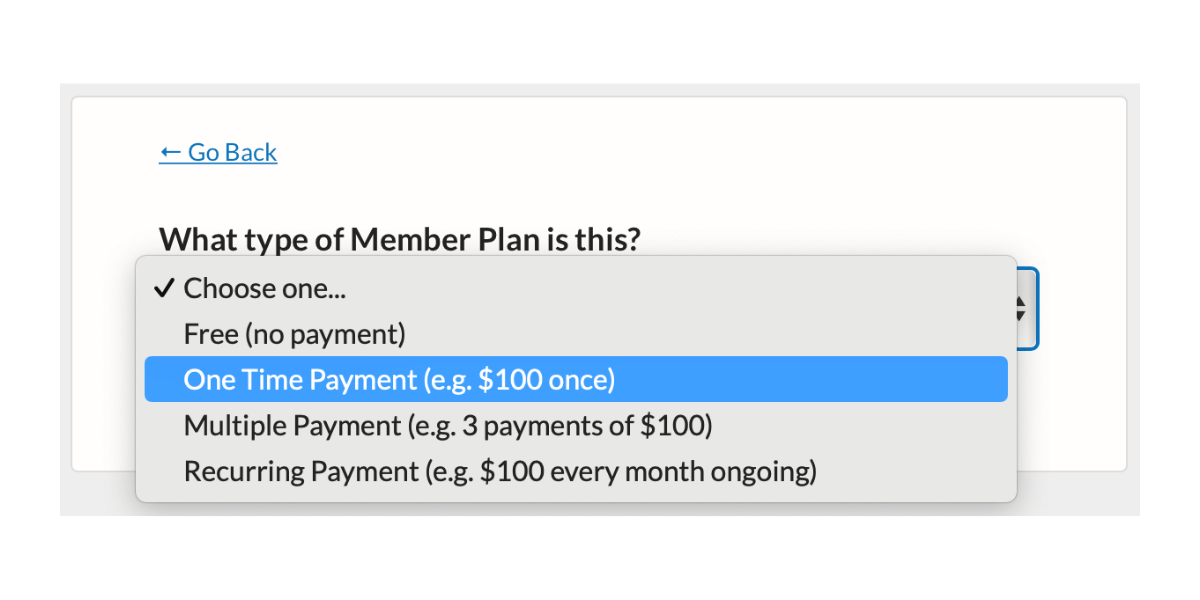
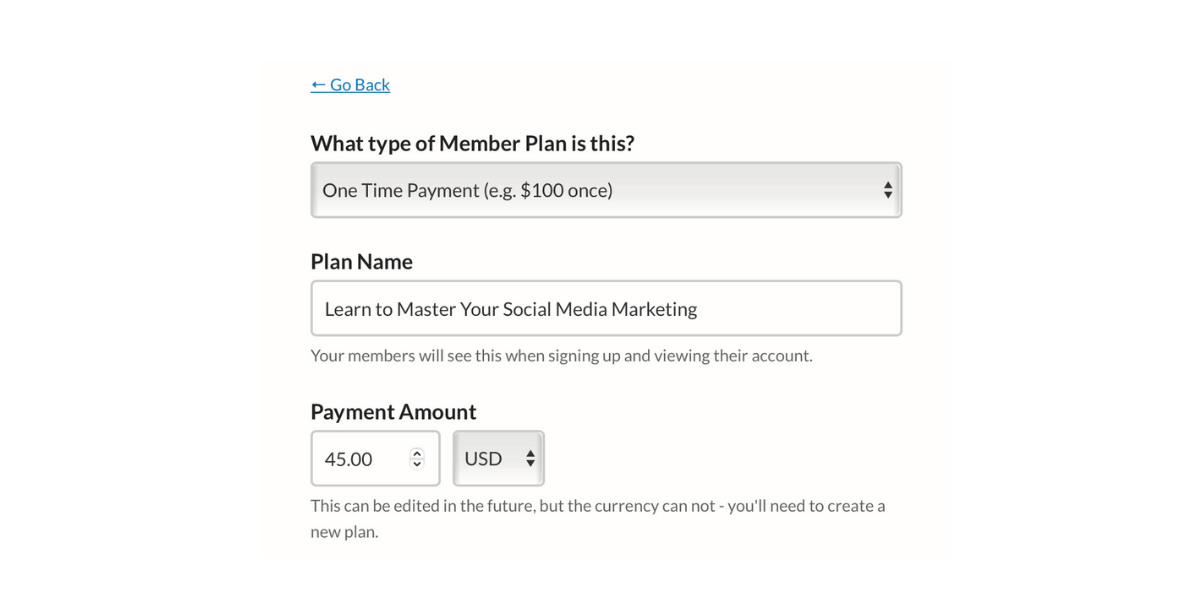
Give your plan a name and a price.
You can opt to leave your plan active indefinitely, or set an automatic expiration date. In this example, we are going to host our event in August and give paid attendees access through the end of that month. This gives us time to upload a recording and offer it to attendees who missed the live call or who would like to re-watch it.
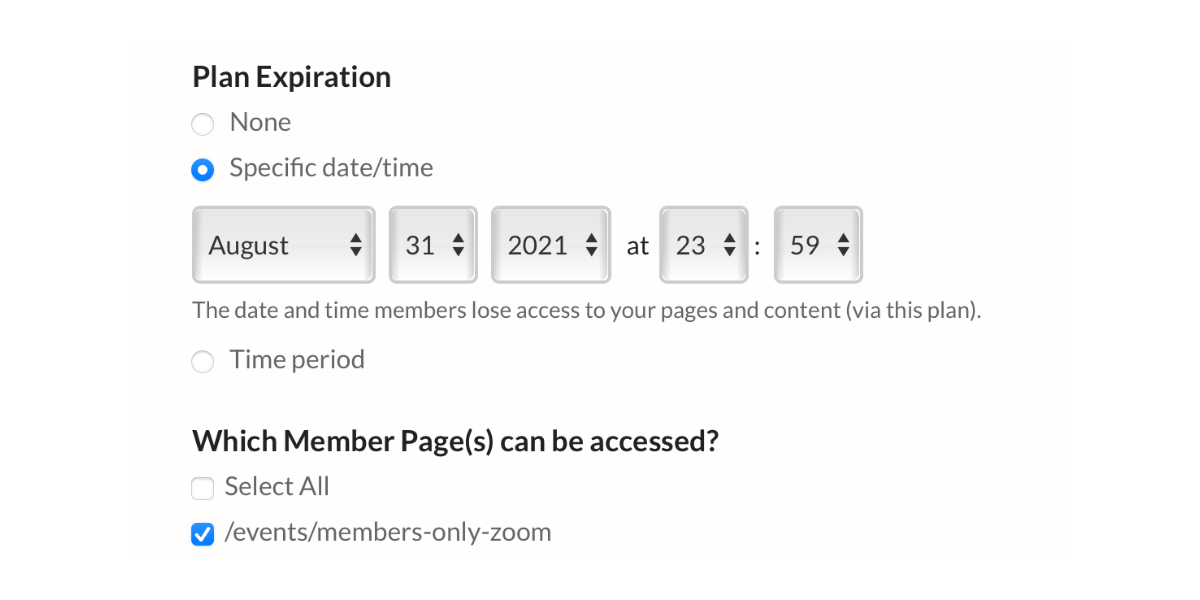
Be sure to select the name of the Member Page you added in step two.
Next, go back to your website and grab the full URL of your “secret” page that displays event details. Paste it in both boxes below to send people there once they sign up:
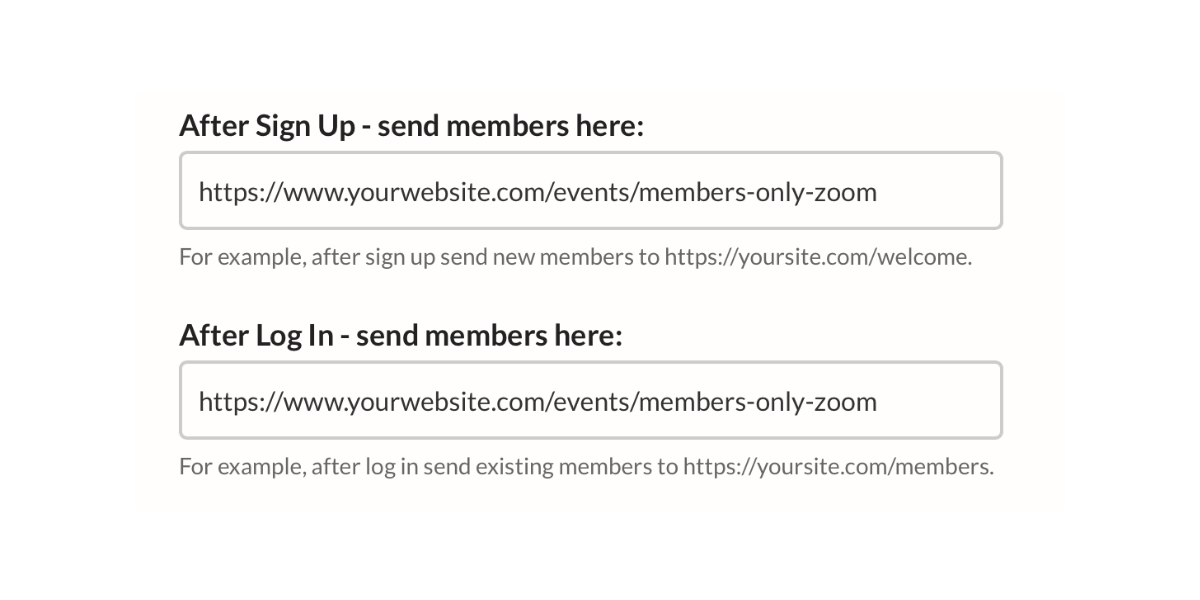
Keep “Enable Plan” and “Make Plan Public” toggled on:
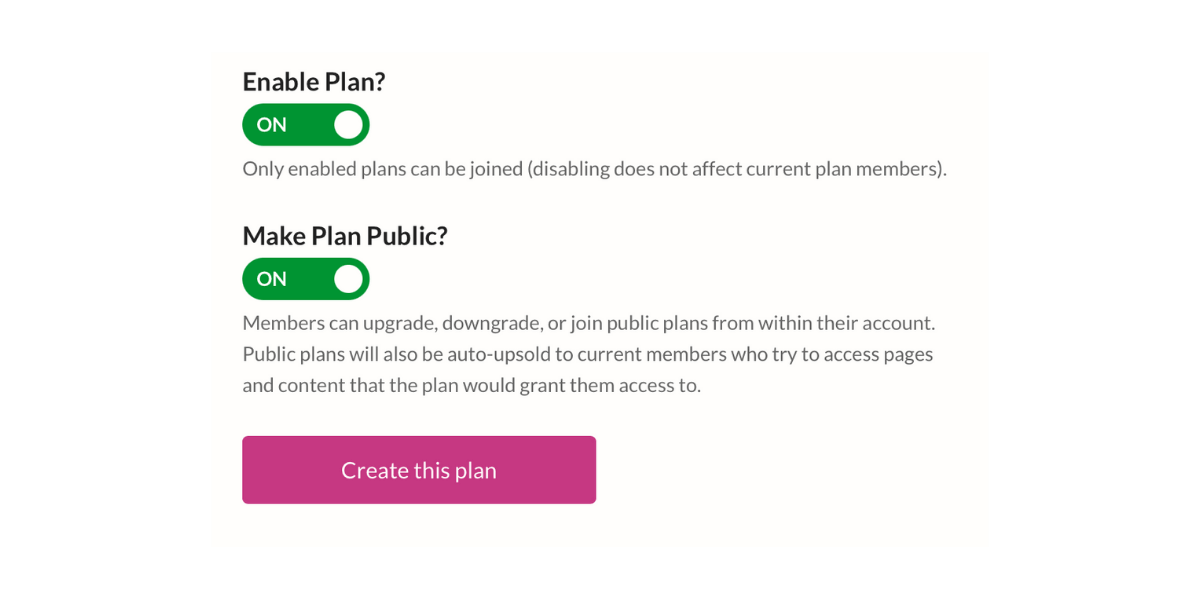
Click the pink button that says “Create this plan” to save.
After saving, click the gray “Get sign-up link” button next to your new plan’s name. Add this link to your public landing page, so people can sign up to attend.
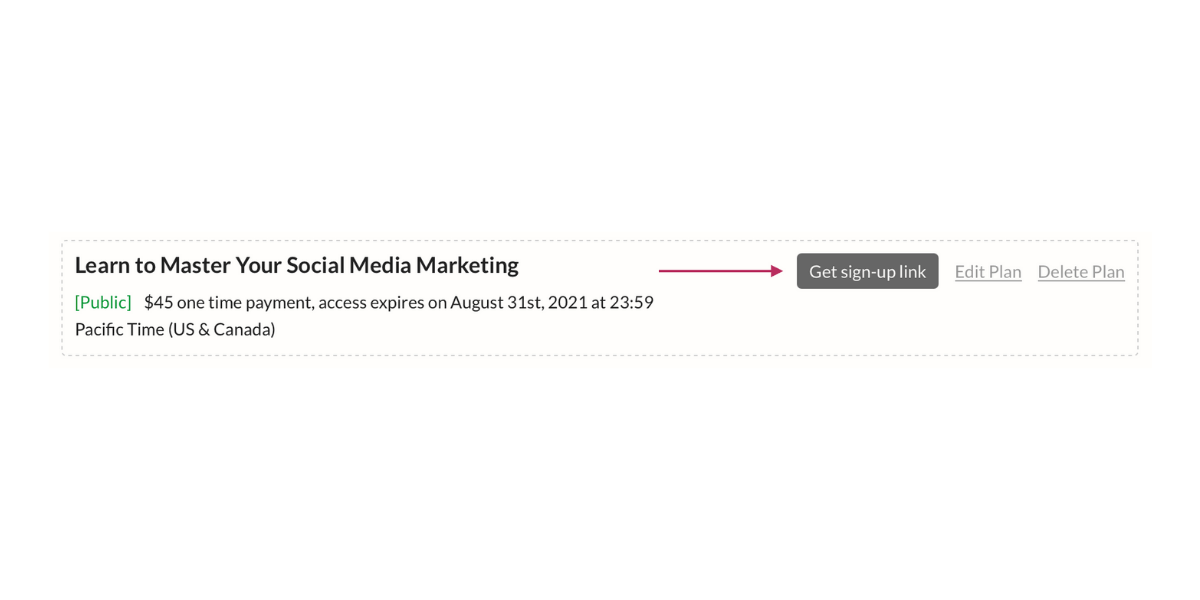
Step Four: Create Your First Paid Zoom Call
You are welcome to use the free Zoom account tier to run your paid calls — just be aware that it will limit your events to 40 minutes and 100 participants. If you’d like to run longer or larger paid Zoom calls, you’ll need to sign up for a Zoom Pro plan.
Sign up for a Zoom account online. Next, download and install the free Zoom app onto your computer. Once installed, sign into your Zoom account. You’ll see a screen like this:
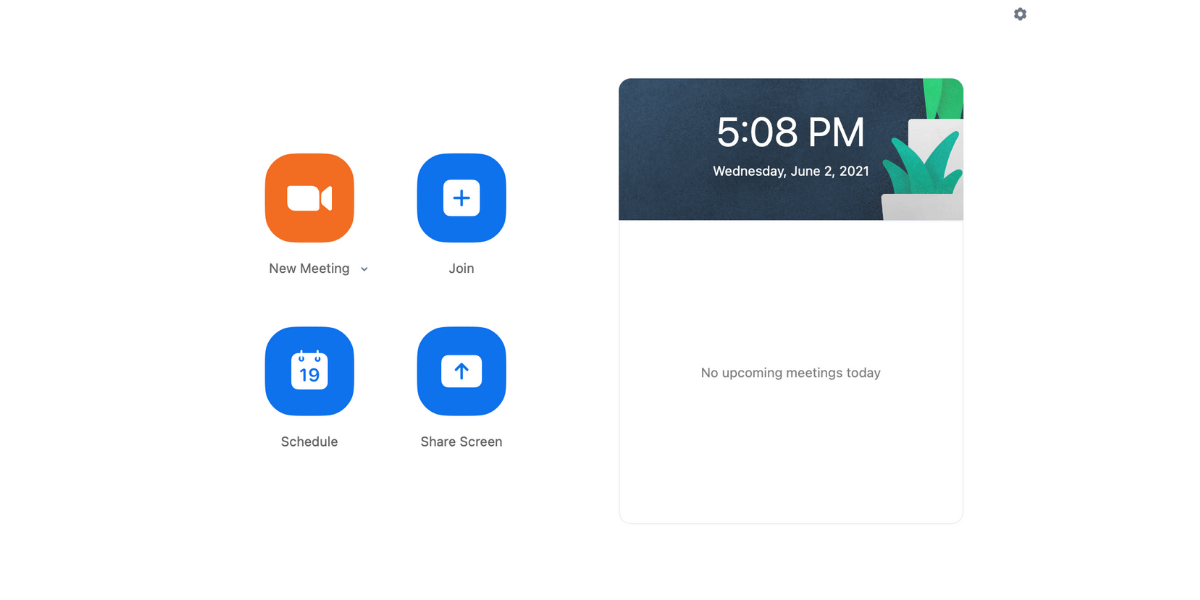
Click on the blue “Schedule” button to create your first event. In the screen that pops up, give your meeting a topic name and time.
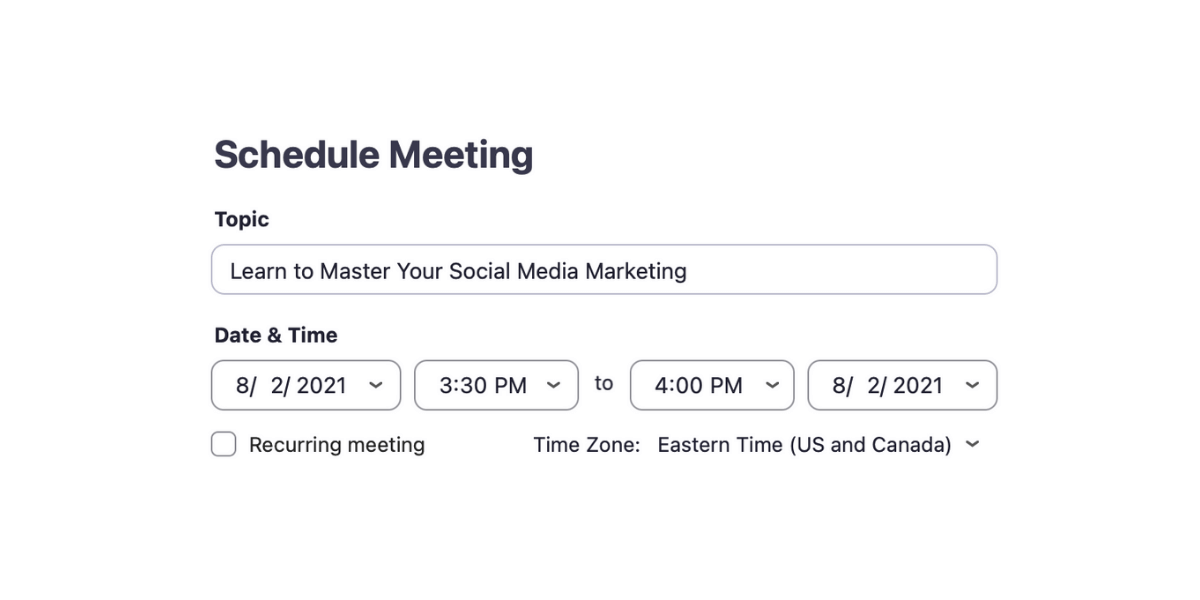
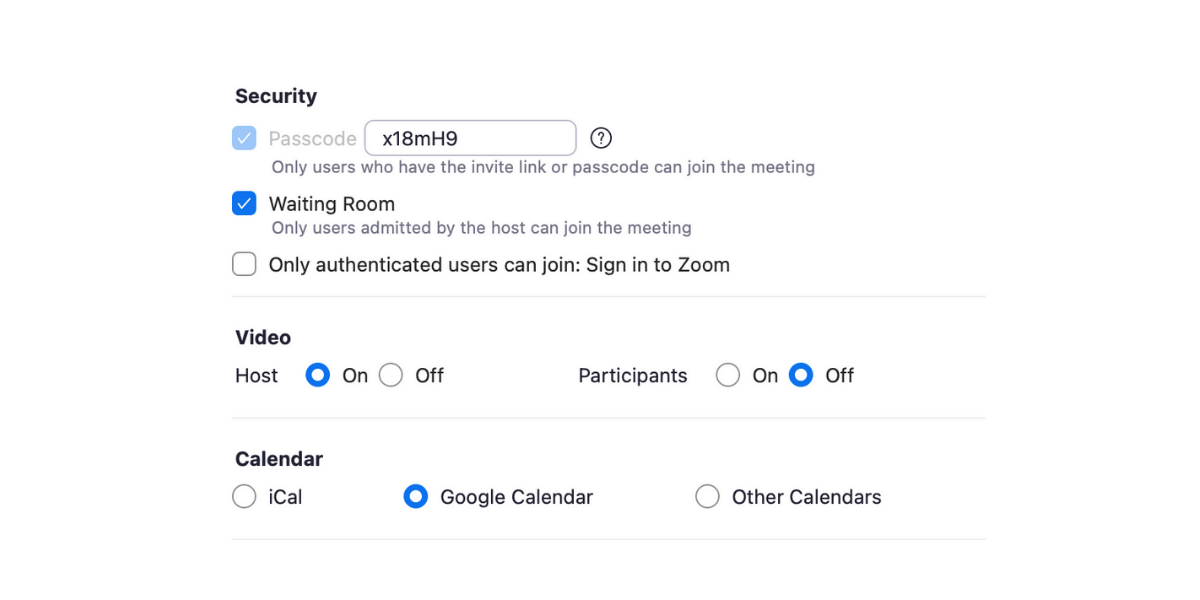
Zoom will automatically generate a Meeting ID and passcode for you. This adds an extra layer of security to your event. Zoom automatically includes the ID and passcode in the event link we’re going to generate — your attendees won’t need to type them in separately.
Click the “Waiting Room” box to give you control over who enters the event. Select your preferences for video settings and click “Save” when finished.
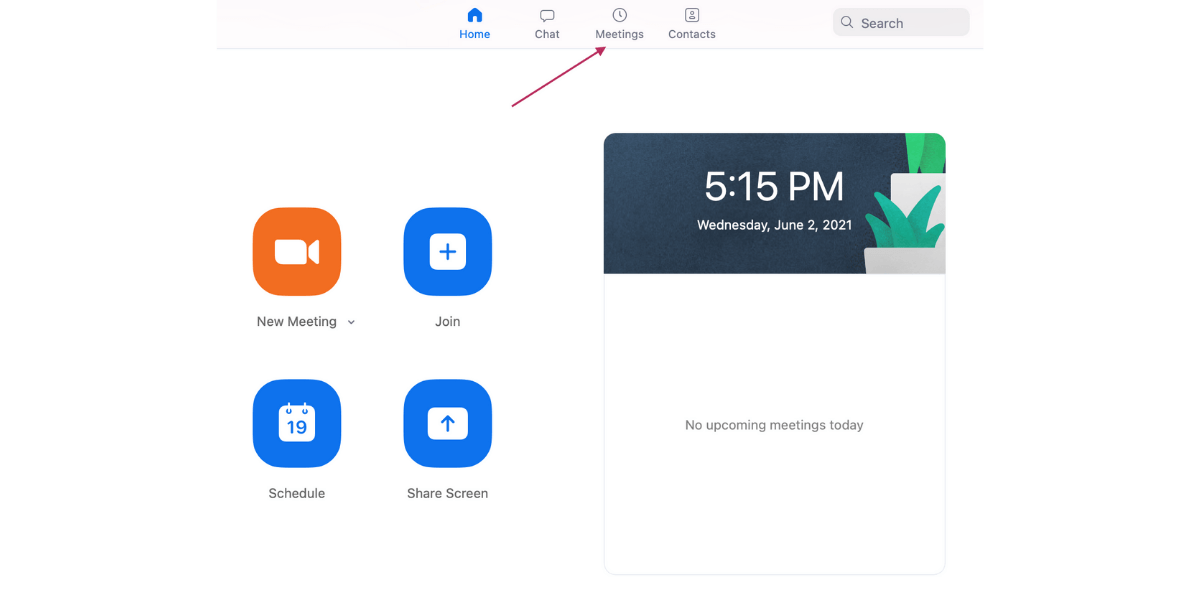
Click on “Meetings” at the top of your Zoom app window.
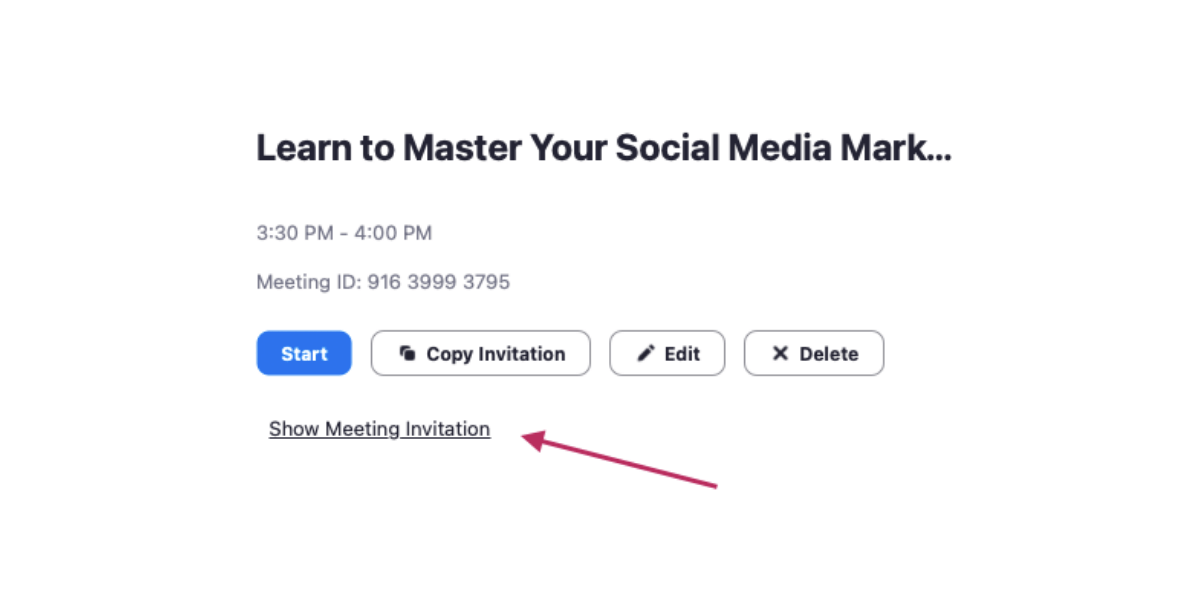
Here, you’ll be able to access a list of all your upcoming meetings. Click on the name of the event you just created in the Zoom app sidebar. Select “Show Meeting Invitation” to get the event link.
Copy just the URL portion of the invite:
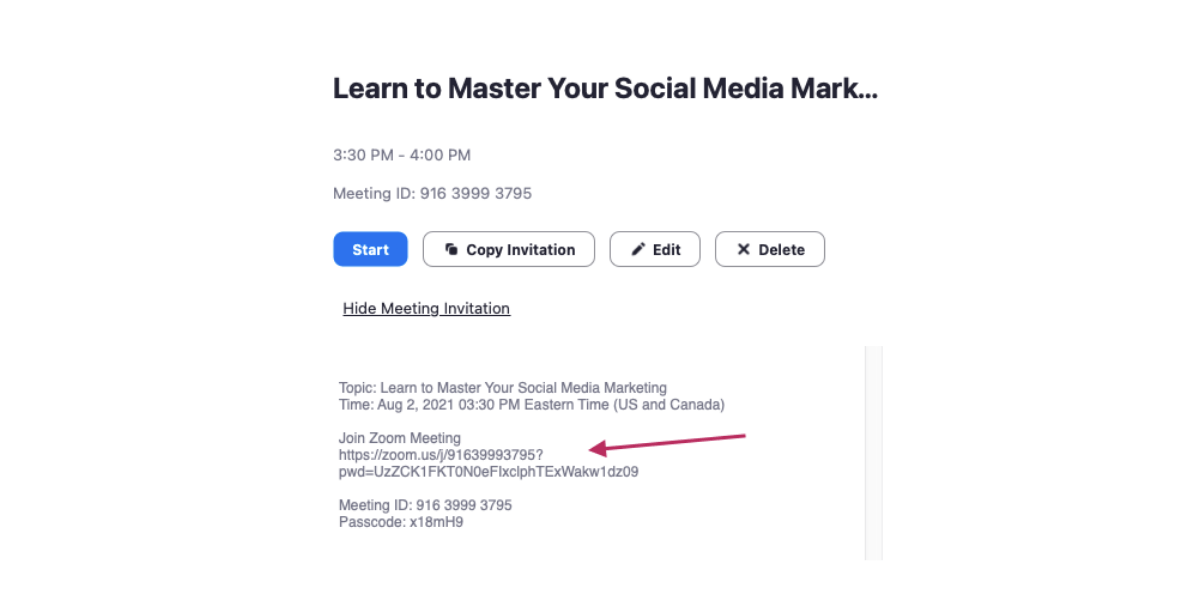
Go back to the “secret” event page you created in step one and add this link to your page. If someone clicks on the invite before the event begins, they’ll be directed to a waiting screen.

Test your new Zoom + MemberSpace integration by creating a temporary free plan or 100% off coupon and use it to “sign up” for your event. This way, you can see exactly what your customers will as they walk through the registration and event page access process. If it all looks good, you’re ready to launch!
Hosting Your Paid Zoom Call
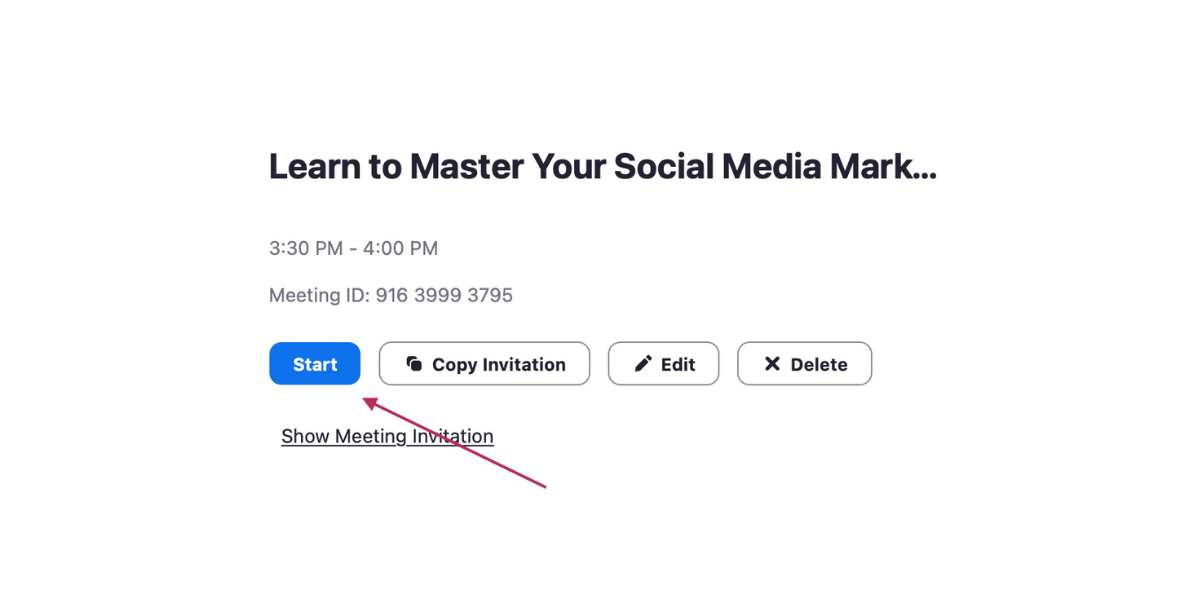
When it’s time for your event, go back into the Zoom app and click the name of your event. Click the blue “Start” button to begin your paid Zoom call.
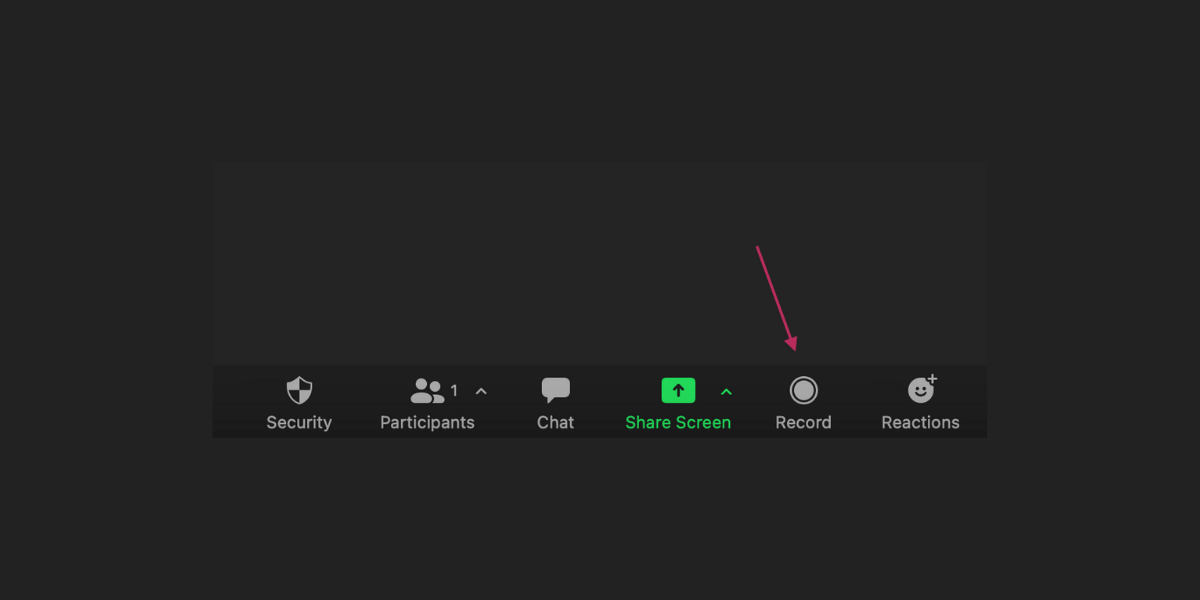
Remember to click the “Record” button at the bottom of your Zoom call screen if you’d like to retain a copy of this event for yourself or to share with attendees. (Recorded Zoom calls are also a great addition to a paid membership content library!)
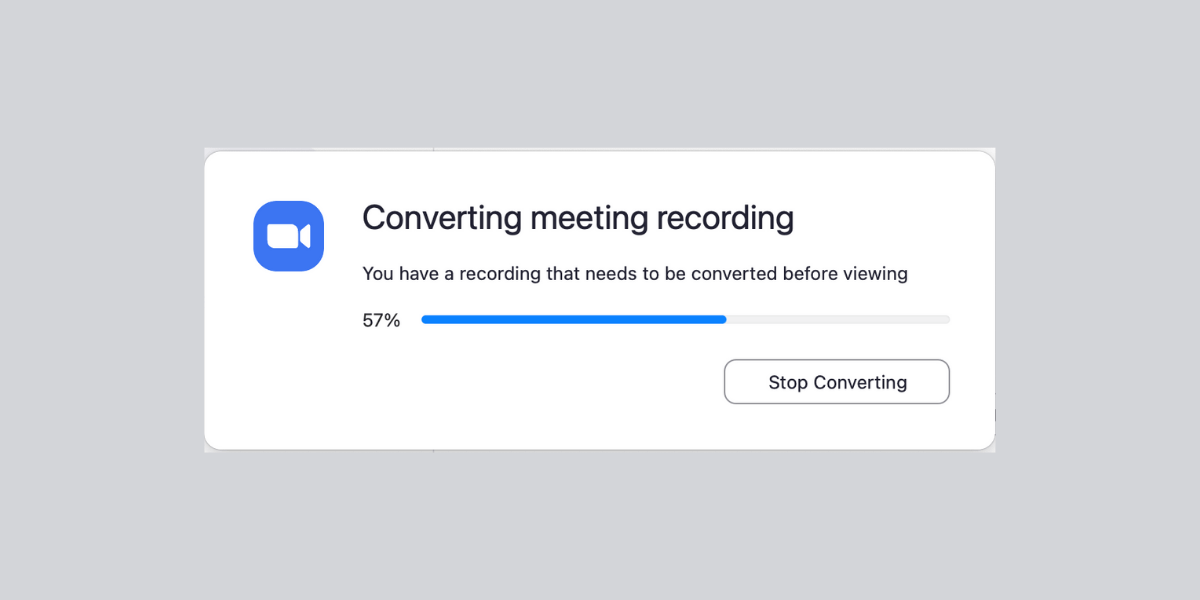
When your call ends, Zoom will automatically convert your recording into a viewable video file:
You can easily access your recorded video files from directly within the Zoom app:
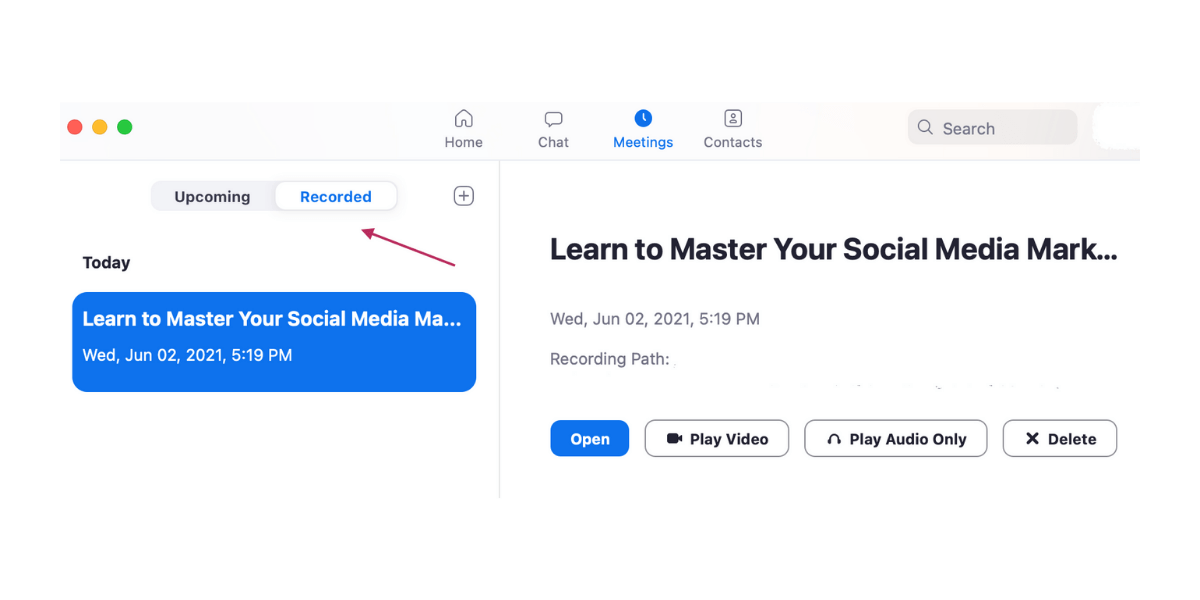
The app will show the file location on your computer, so you can easily upload it to your event page afterward.

Tweet us or share your new Zoom class landing page link with us on Facebook, LinkedIn, or in the MemberSpace community. We love seeing what you create!