Build a members-only community!
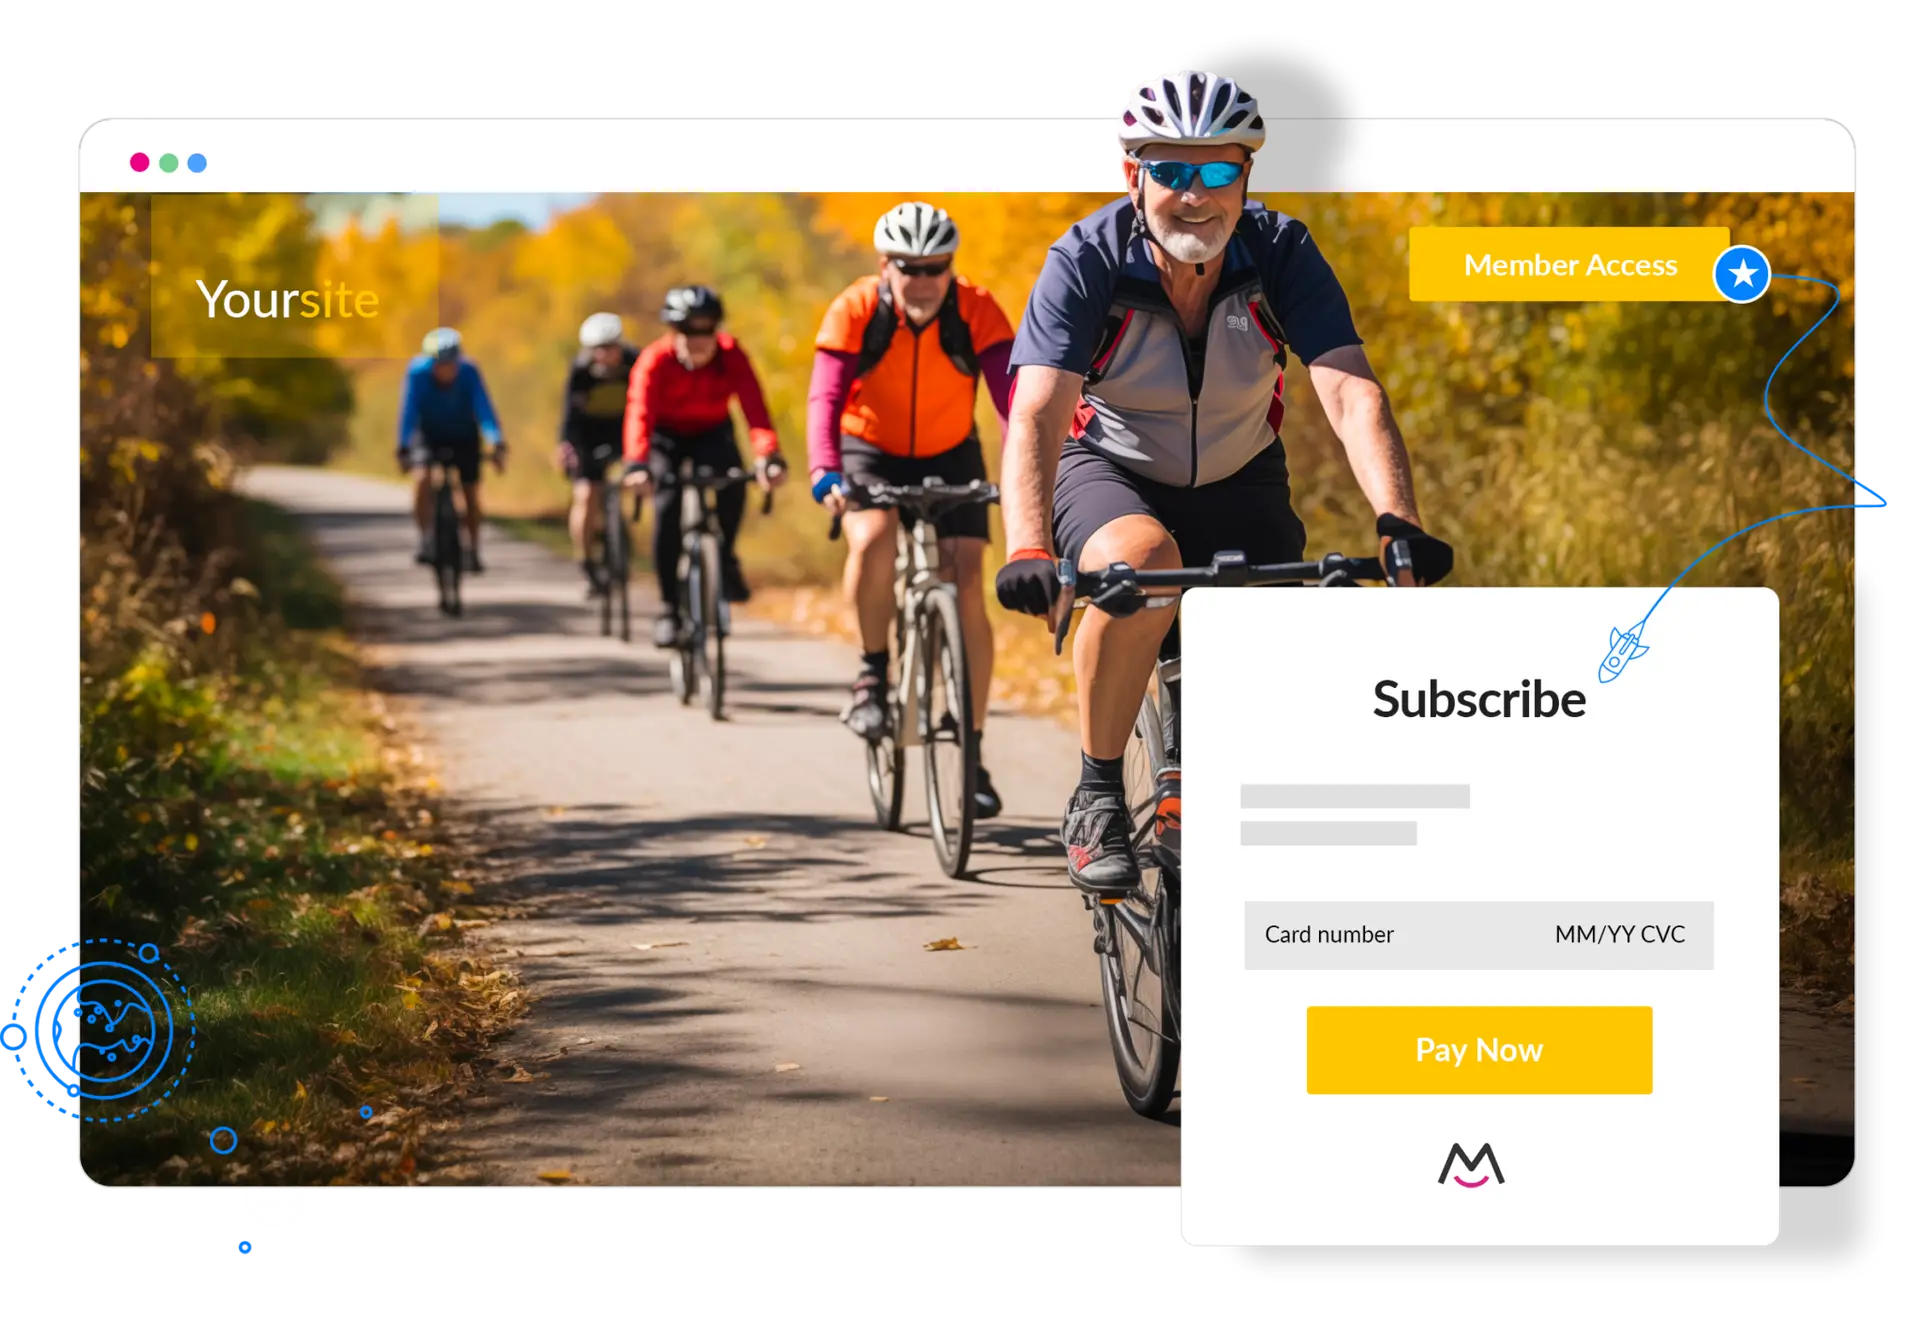
Add a member-only community to your website with paid or free access. Works on any platform including WordPress, Squarespace, Wix and more. Set up your community now.
Build a members-only community with revenue boosting features including:
- Sell content across tiers
- Google signup for members
- 1-click subscription payments
- Member pricing changes
- Trial periods for any plan
- Abandoned signup reminders
- Cancellation alternatives
- Real live support
How does MemberSpace work?
We provide all of the tech you need to sell digital products and manage your free and paid members.

Add our snippet of code
MemberSpace installs in 5 minutes on any site, including Squarespace, WordPress, Notion, Wix, and custom HTML.

Gate member-only pages
Add our MemberSpace paywall around the web pages that contain your digital products, courses and more.

Accept paid members!
Earn more with flexible, revenue-boosting features like selling across tiers, trials, and 1-click signups and payments.
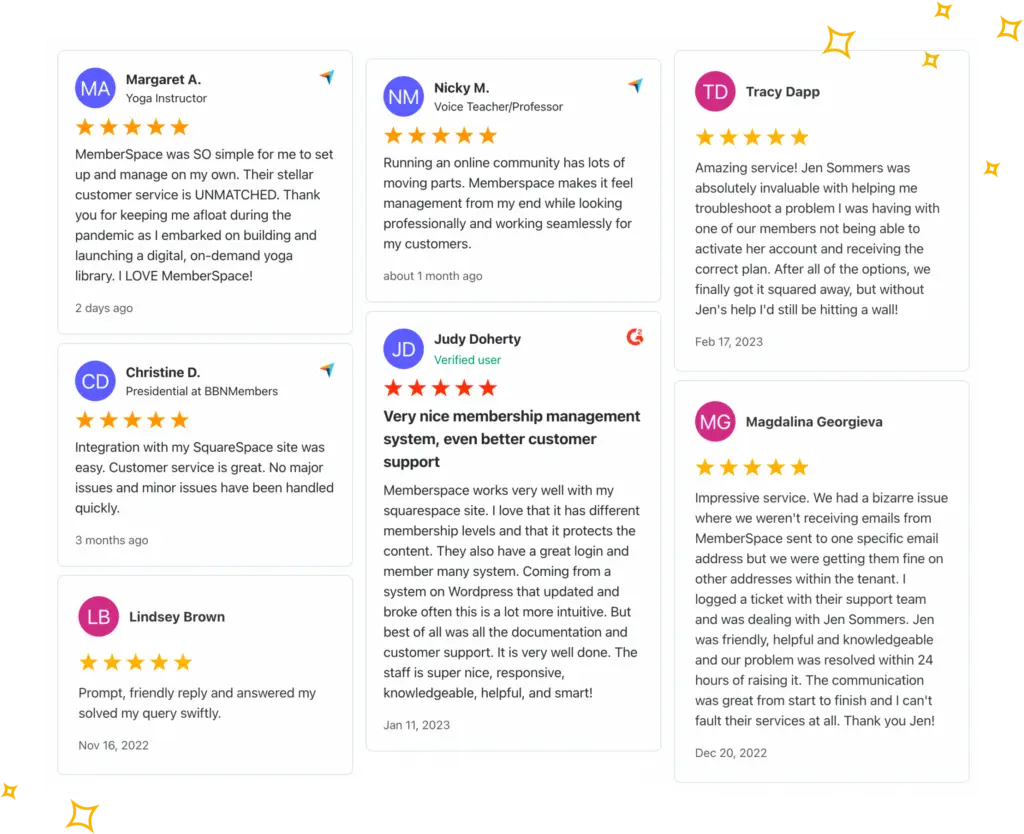
MemberSpace Reviews
Creators love MemberSpace. Read reviews from happy customers.


Why use MemberSpace?
Our software provides everything you need to launch, build and grow your membership business on any platform. Below is a list of our features and integrations.
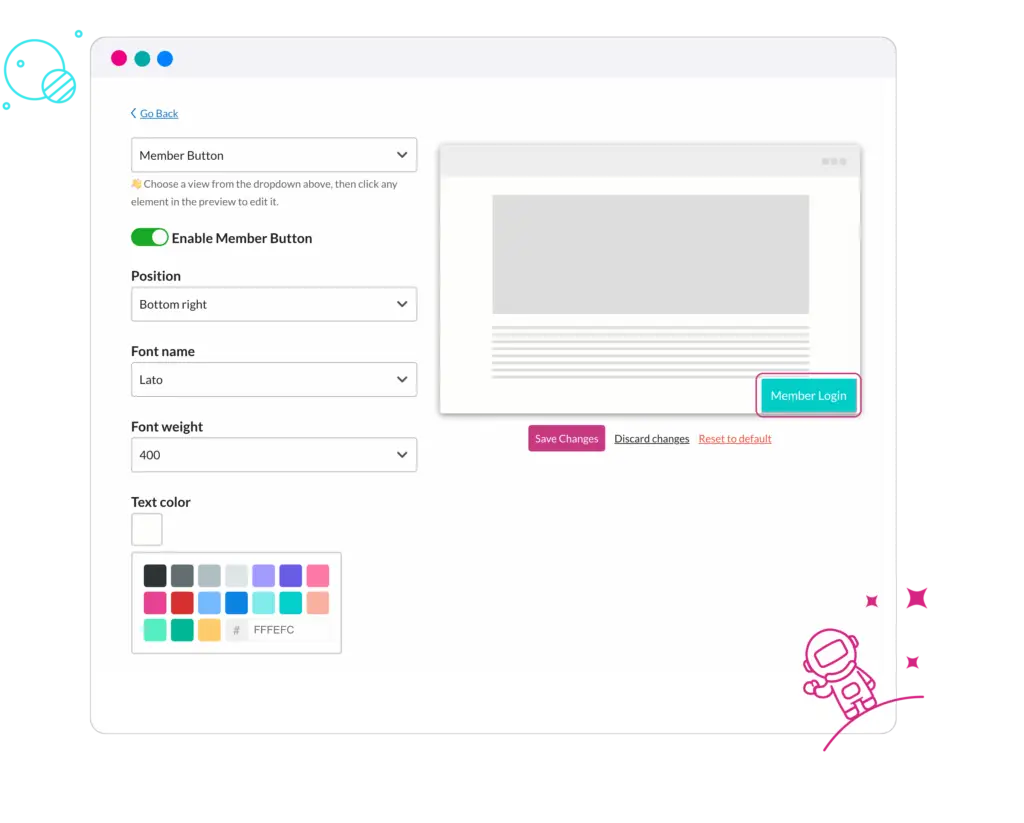
No coding required.
You shouldn’t need to hire a developer or have technical skills to build and run a membership site. MemberSpace is a simple solution for non-technical people.
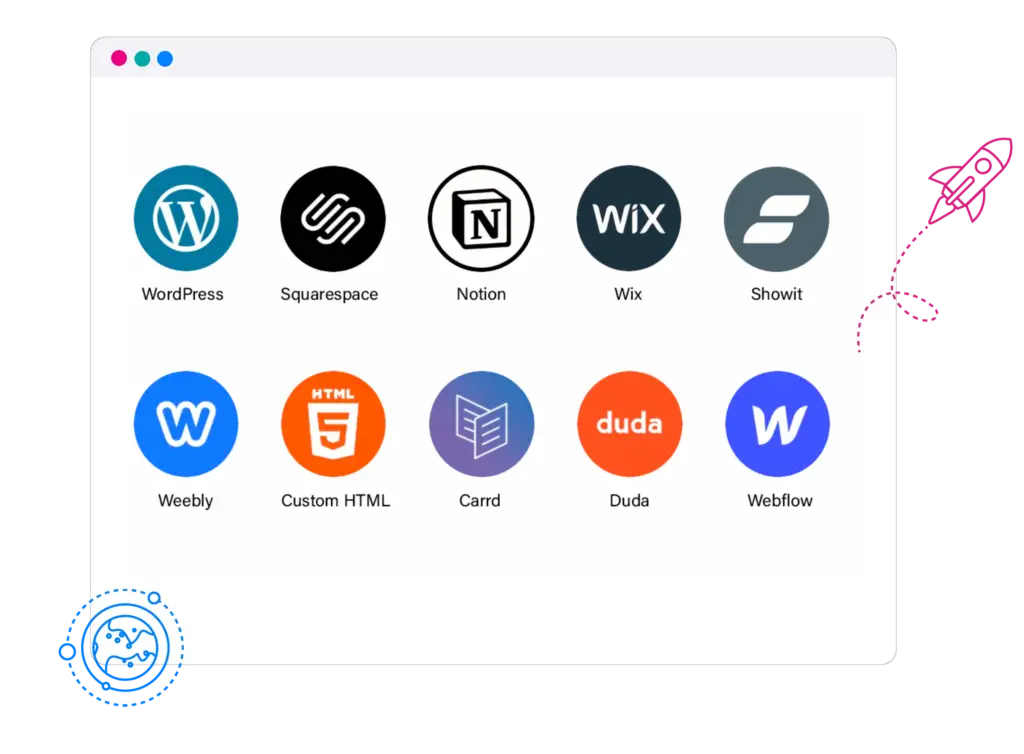
Your website, any platform.
Customer service is our top priority.
We help grow your membership with friendly VIP support. Connect with our team for any tech or strategy questions and get a quick, helpful response. But don’t just take our word for it, read our excellent G2, Trustpilot, Capterra, and other MemberSpace reviews.
Migrate for free.
Migrating your membership to different software can seem like a daunting task. We make it easy, simple, and painless. So if you have an existing membership system, we’ll help you migrate to MemberSpace for free. Learn more about migrating to MemberSpace.
Launch a Paid Member's only Community Site with Circle and MemberSpace
As you begin building your membership business, you’ll find that you start to attract a community of engaged and excited people, all interested in what you have to offer. It’s only natural that as your audience grows, they’ll want to interact with you (and each other) more.
A paid community is the perfect opportunity to expand your membership business, grow your brand, and develop relationships better than you can on social media.
Why Create a Paid Community?
Membership communities can exist on their own or be paired with another offering, such as a content library or paid newsletter. You don’t have to create a product to build your first community, though! Anyone can create a paid community that’s built around discussion between people with similar interests. You could create a paid community for:
- Creative professionals to network and share leads
- Startup founders or aspiring entrepreneurs
- Parents in need of communication and support
- Educators interested in sharing resources and tips
- Fans of a particular sport, music group, artist, author
- Anyone or anything that attracts interest
How to Create a Membership Community
To start your first membership community, you’ll need:
- A website to advertise the community and membership plans
- A mission or guidelines for your community — what type of content should people be sharing? What kind of community do you want to foster?
- A way to process recurring membership payments
- A community platform on which to host discussions and allow the community to congregate
While there are several ways to facilitate discussion between community members, we recommend Circle. Together, MemberSpace and Circle make it easy to create exactly the kind of community you’ve always wanted to join — a place for people to chat and get advice from an expert…you!
Why Build Your Community with Circle?
Circle takes the best parts of online forums and Facebook groups, blending them into a platform that’s private and exclusive to your members. When you organize your community through Circle, members can access your content through their browsers or via Circle’s iOS application. It gives you all the benefits of having a native app for your community, without any of the headache involved in developing it.
As the leader of a Circle community, you can:
- Organize conversations into designated spaces (groups) by topic
- Set up your community so that new members are automatically added to specific spaces when they join
- Stream live sessions to the community
- View statistics and see how members are interacting with your content
- Customize your community space so that it matches your website and brand
Circle also supports direct messages, so you and your members can have engaging conversations outside of designated spaces.
Circle supports single sign-on (SSO) with MemberSpace — as soon as your members log into your website’s member area, they’re also logged into Circle!
Circle plans start at $39 per month and are charged separately from your MemberSpace subscription.
Setting Up Your First Paid Community with Circle and MemberSpace
Before getting started, make sure that your website CMS works with MemberSpace.
Once you’ve confirmed that you are using a compatible platform, you’ll need to:
- Join MemberSpace for free
- Install MemberSpace on your website
- Install MemberSpace on your Circle site
- Set up a free Stripe account to process payments
Step One: Build a Membership Community Landing Page
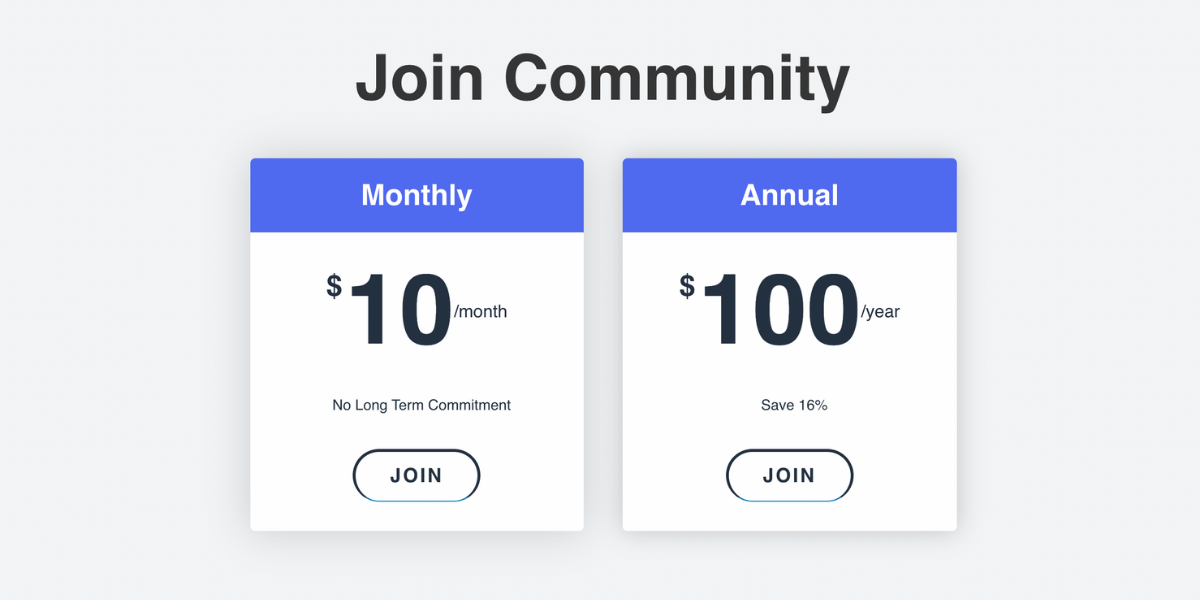
Create a public landing page on your website. This page will display plan options with signup buttons:
Step Two: Lock Your Community Page(s) with MemberSpace
Log in to the MemberSpace backend and click Products > Add Product. 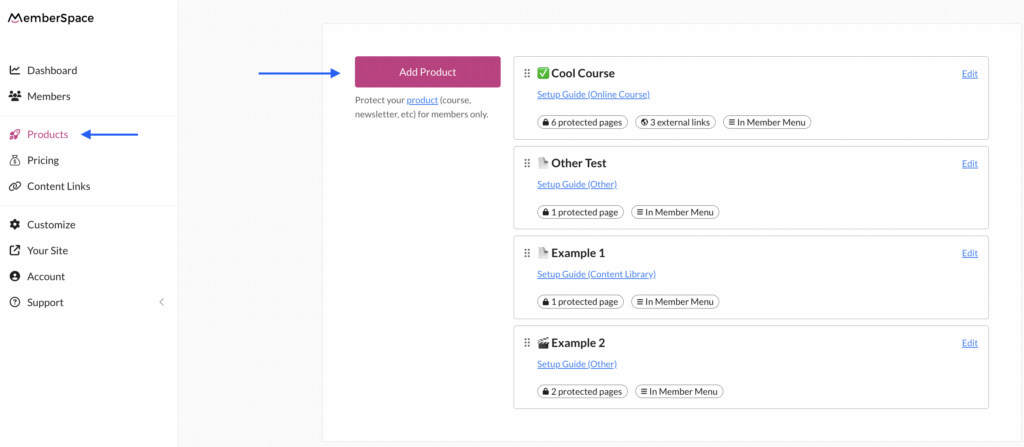
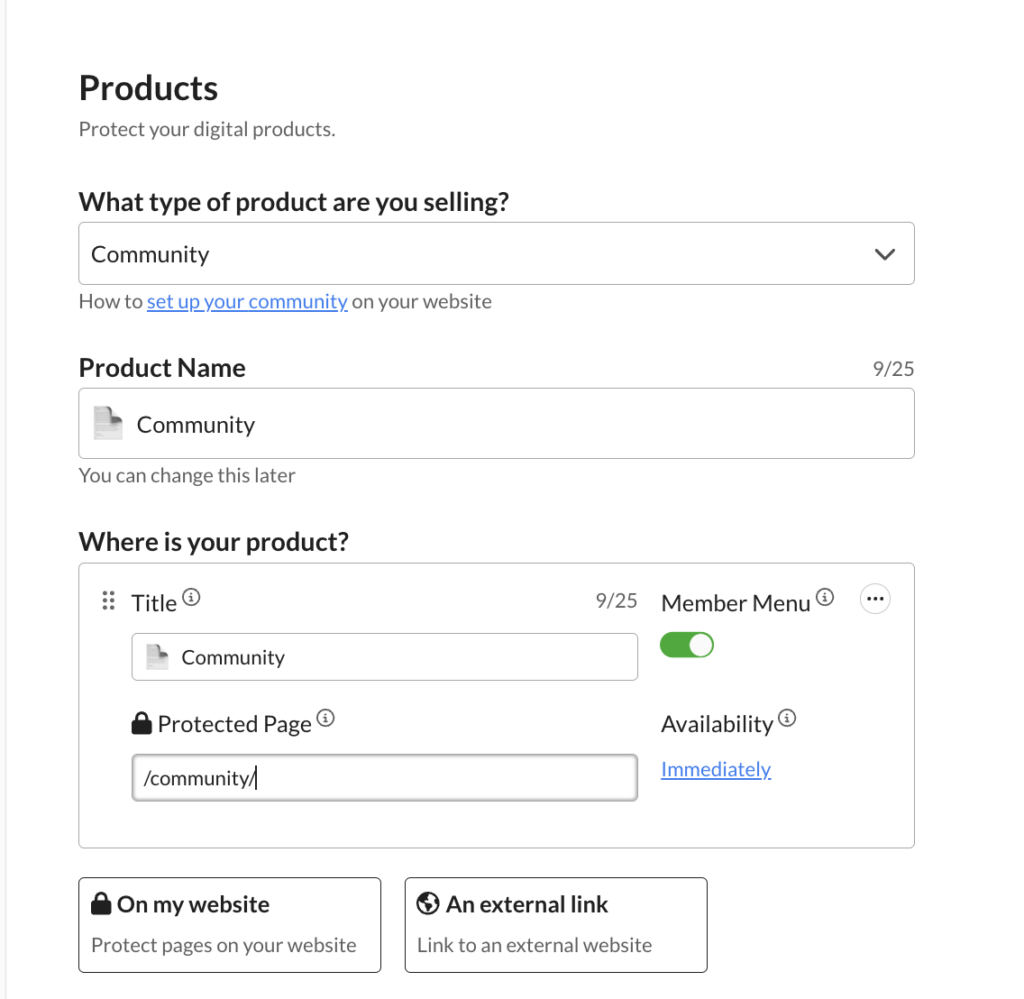
Now, select Community under What product are you selling? Then, add the URL for your community landing page under Where is your product? > Protected Page.
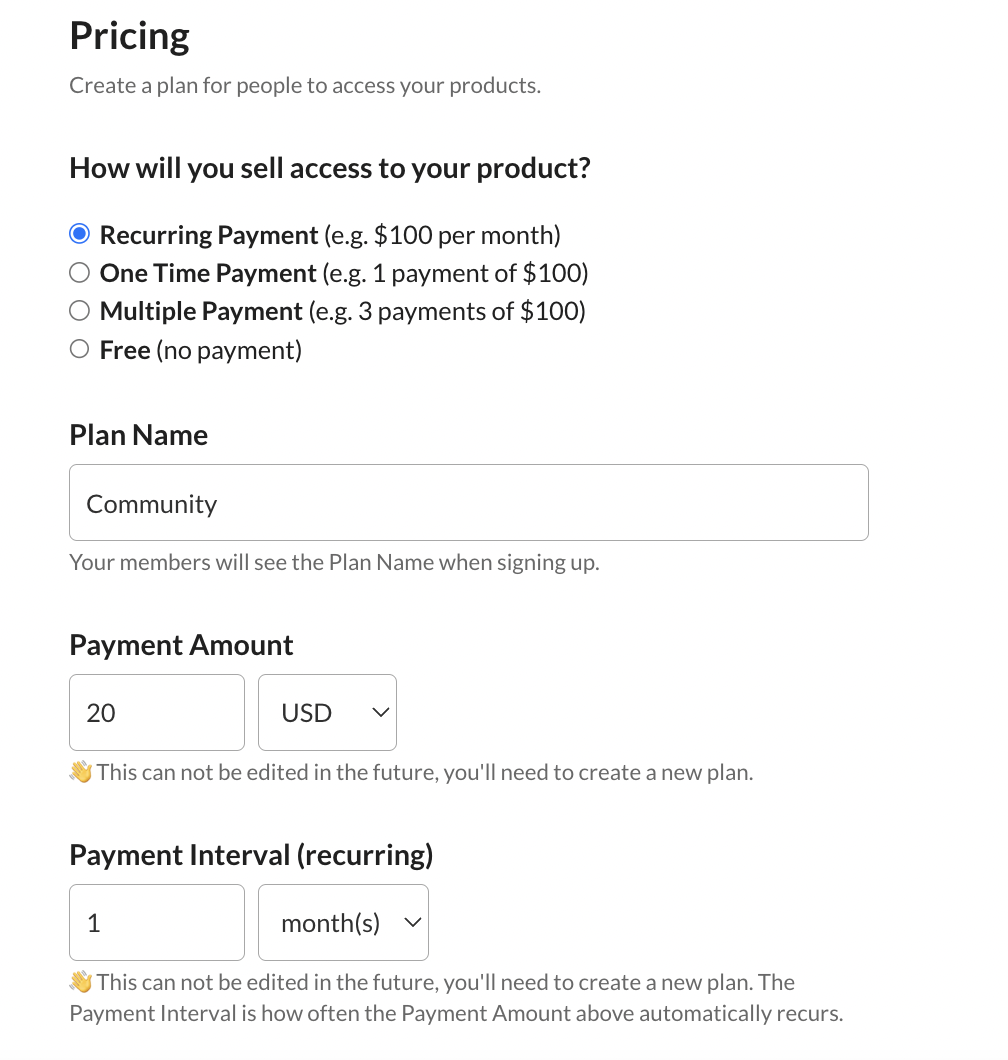
After adding your community, it’s time to set pricing. Select Pricing on the lefthand side, and click Create Plan. Under the How will you sell access? drop-down menu, choose ‘Recurring Payment’. Paid communities typically charge members for access on a month-to-month basis, so we’re going to select “recurring payment.”
Step Three: Set Up Circle SSO
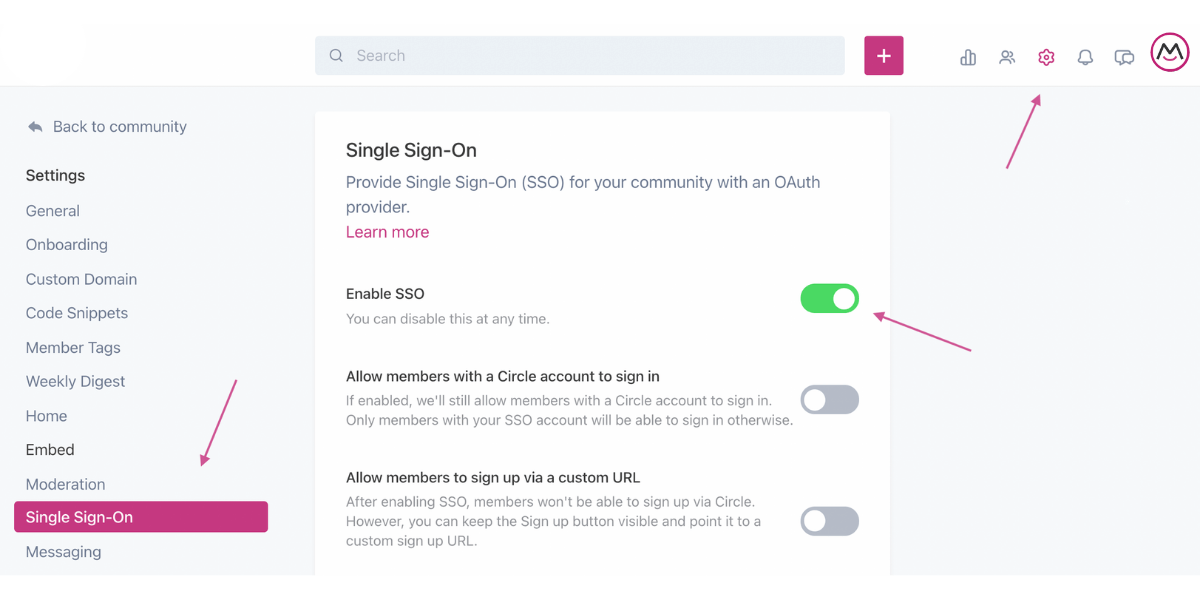
Log into your Circle account and click the settings icon in the top right. Next, click “Single Sign-On” and toggle on “Enable SSO.”
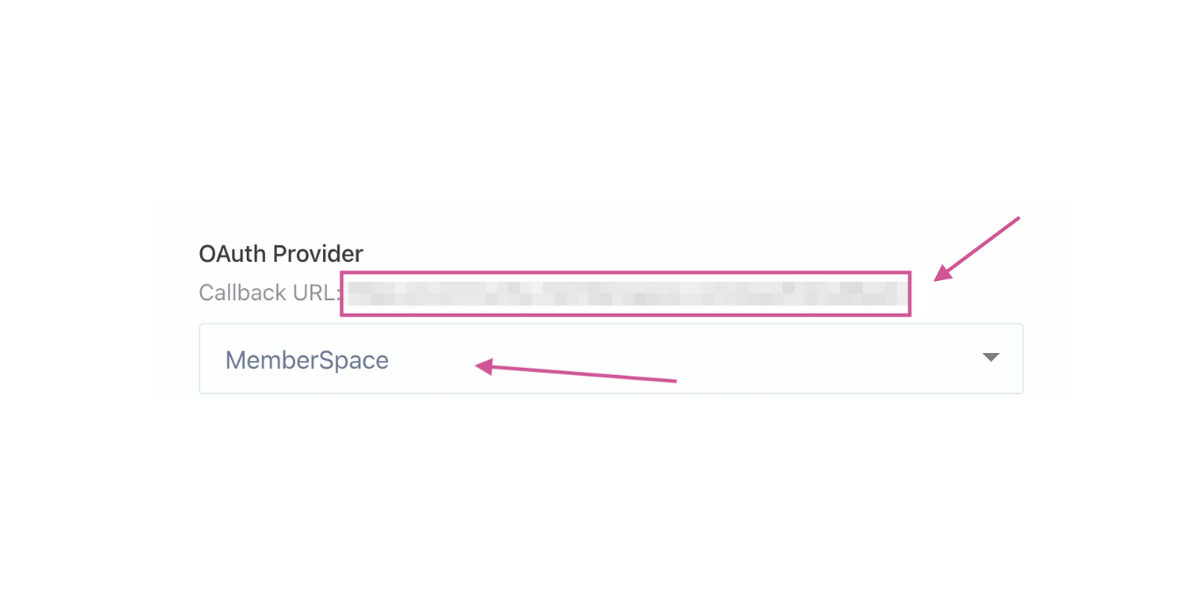
Next, select MemberSpace in the OAuth Provider drop-down menu. Copy the callback URL that appears.
Go back to MemberSpace and click Customize at the top of the screen. Click on “Integrations.” Click “Circle.”
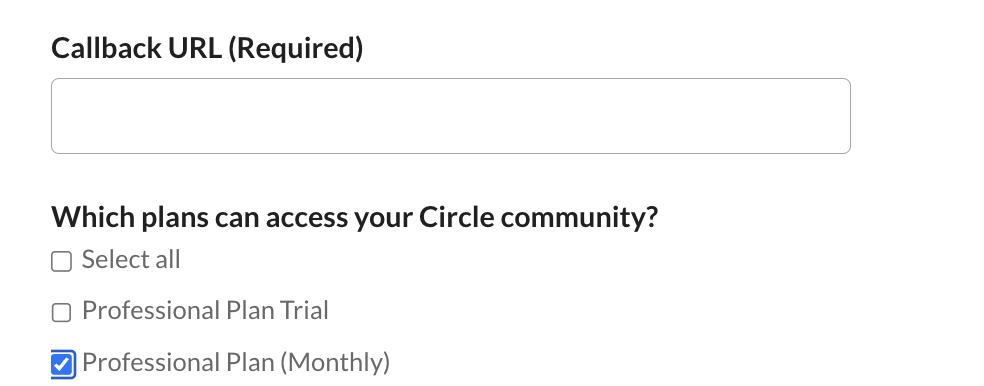
Paste the callback URL you copied in Circle and select which plans can access your paid community i.e. the plan(s) you just created earlier.
Click the pink “Update Now” button to continue.
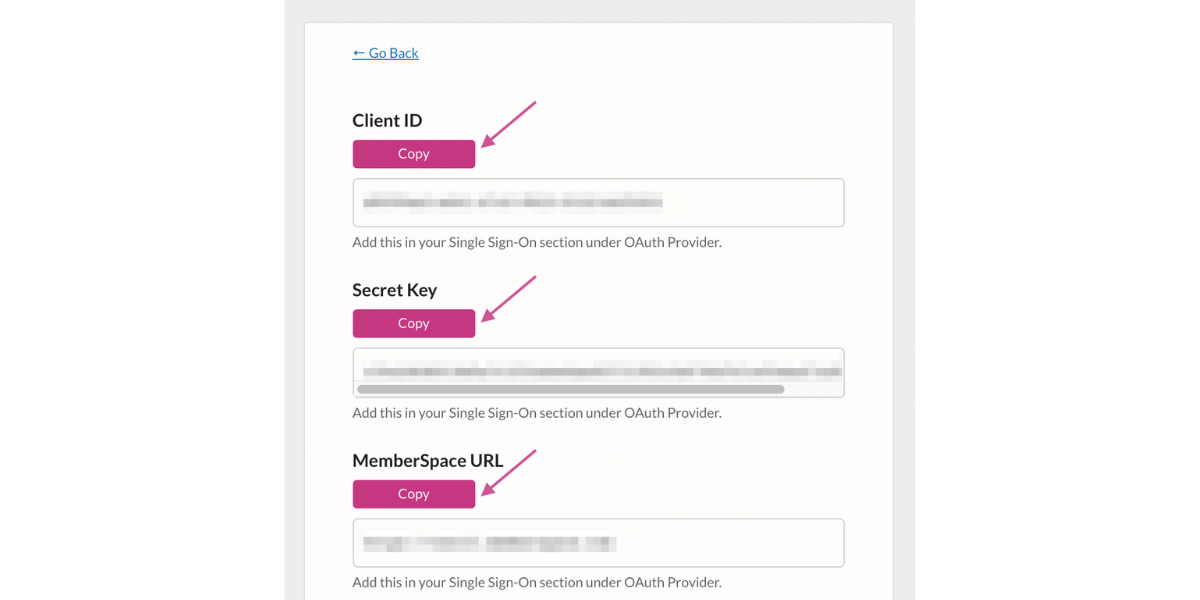
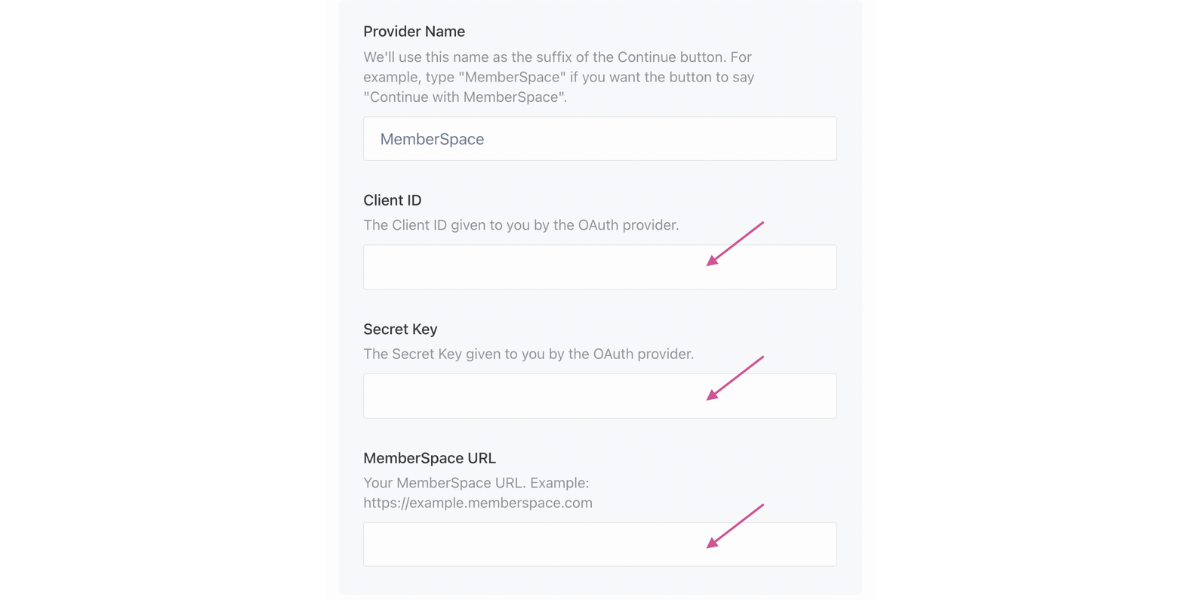
Copy the Client ID, Secret Key, and MemberSpace URL one at a time, pasting them into the corresponding fields in Circle.
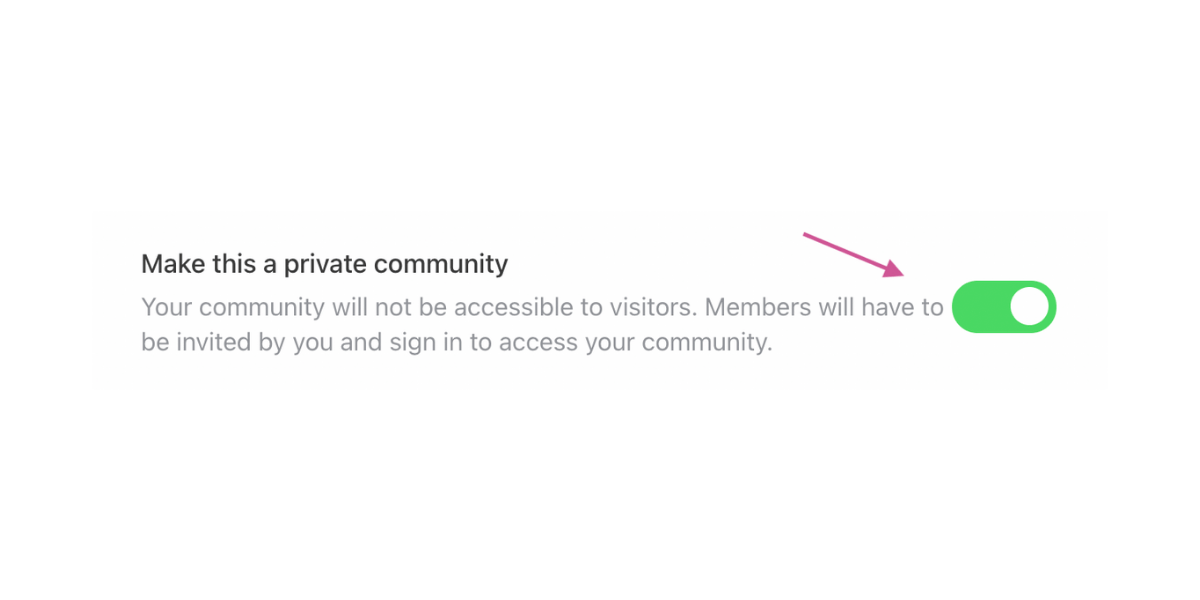
Go back to your Circle account settings and click “General.” Toggle the “make this a private community” option on and click “save changes.”
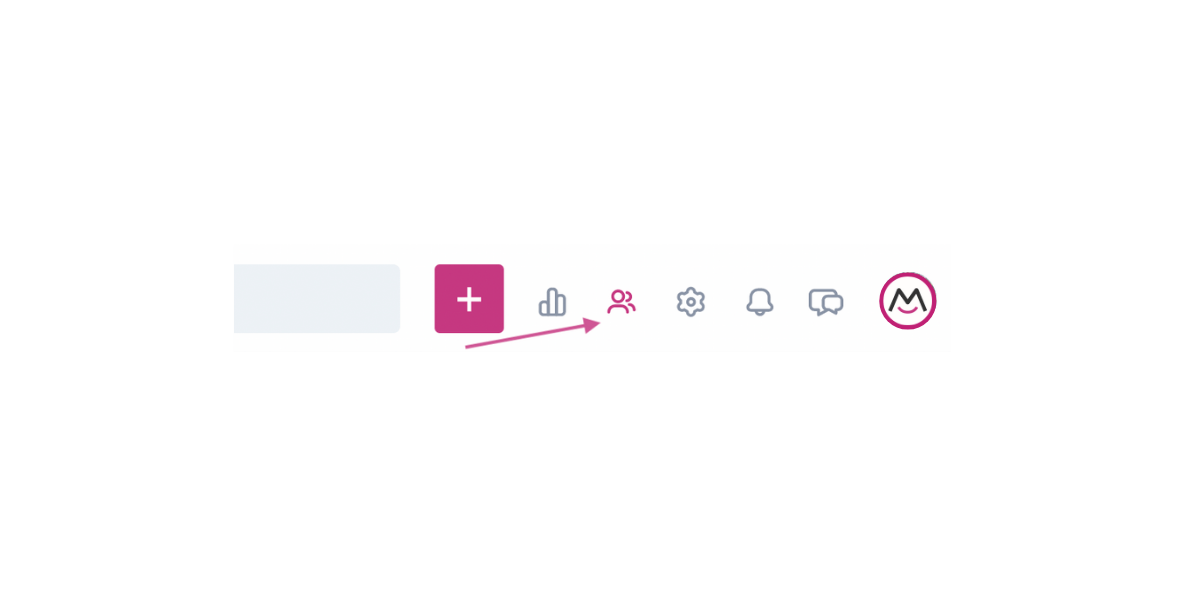
Go up to the top left on your Circle dashboard and click the icon that looks like two people.
Next, click “Invitation Links” in the sidebar and then “Create an Invitation Link.” Copy the link that is generated. This is the link you’ll use to bring new members to your private Circle community.
After you create the link you should use that wherever you link to your Circle community so that any members who click it will automatically be added to the Spaces you specified.
Step Four: Finalize Pricing Details
Go back to MemberSpace and click on Pricing at the top. Click Edit next to the name of the plan you created above.
Then, scroll down to the section that starts with “After Sign Up.” Paste the link to your Circle site in both the fields below.
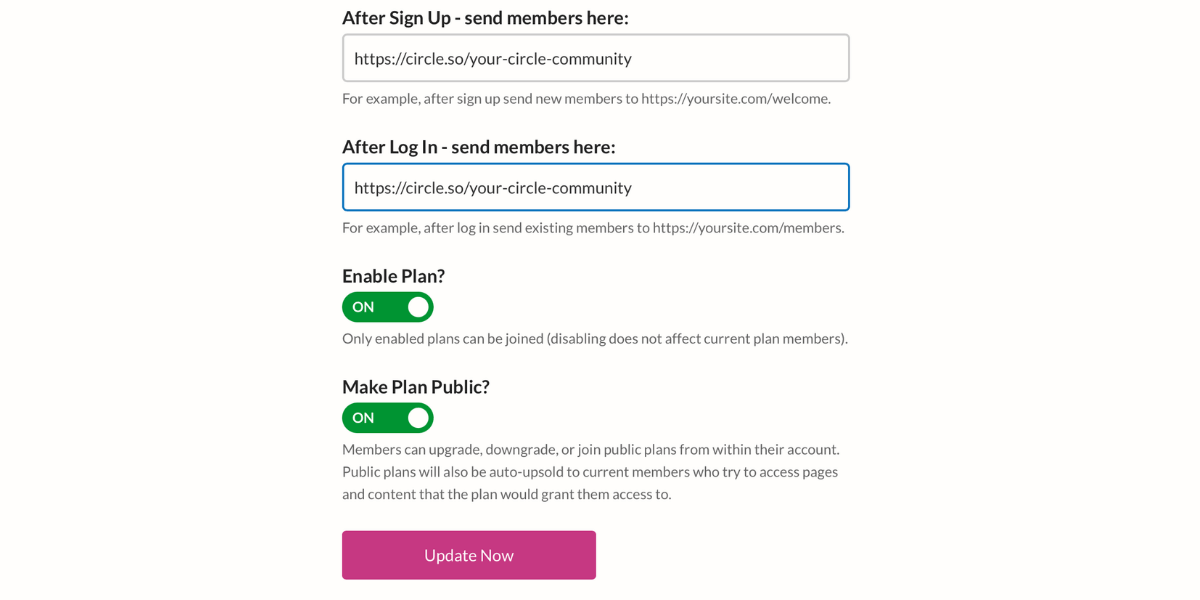
Make sure Enable Plan and Make Plan Public are toggled on and then click “Update Now.”
After saving, click the gray Signup link button next to your plan name.

Add the link to your public landing page so people can sign up to join your community!
Step Five: Test Your Paid Community Membership
It’s a good idea to test your new community setup before officially launching. Make a free test plan or temporary 100% off coupon and use it to “join” your course. Once you’ve logged in to your website as a “member,” visit your Circle community and make sure that the SSO connection is active — you should be automatically logged in.
Once you’re satisfied with the setup, you can delete your test plan or coupon if you so choose.
You’re now ready to begin enrolling new members in your community plan!
How to Build Your Paid Membership Community
If you’ve begun cultivating an audience online, you’re already on the right path to developing a membership community.
- Post about your private community on social media channels
- Tease members-only livestreams by uploading a short preview video to Facebook or Instagram Stories
- If you already have a free Facebook Group for your audience, offer the paid community as an alternative with perks and additional access to you
- Invite your paid newsletter or private podcast members to upgrade for “office hours” and exclusive Q&A sessions
- Upsell current and former online course students on your community for continued learning
- Pair your community with access to a membership content library as an upgraded bundle for existing members
Starting a membership business for the very first time? Learn how to launch successfully with our step-by-step membership marketing plan guide!
You can promote your new membership community anywhere you can paste a URL — just share the link to your public landing page and watch your member count begin to grow.
Show us your new membership landing page on Twitter, Facebook, LinkedIn, or in the MemberSpace community. We’d love to see what you create!
