Haiden Hibbert
If you’re looking for a way to monetize your digital resources, creating a content library on Squarespace might be the perfect solution. A well-organized content library can transform your website into a source of recurring revenue, whether you’re offering videos, templates, or any other digital resource. In this post, we’ll walk you through the steps on how to sell a content library on Squarespace.
Launch a content library on Squarespace!
The easiest way to accept membership payments or one-time charges for digital products like content libraries, online courses, communities, and more — all from your own website!
Get started for free! 5 minutes to set up.
Table of Contents
Why Create a Content Library on Squarespace?
Creating a content library is a great way to build passive income and add value to your online business. If you’re already creating digital products such as videos, educational resources, or design templates, selling them in an organized library can help you scale your business and earn recurring revenue. Tools like Squarespace and MemberSpace make this process simple, even if you’re not a web design expert.
Step 1: Create and Organize Your Digital Products
The first step to building a content library is deciding what digital products you want to include. Think about what your audience needs and values the most. Some ideas for digital content include:
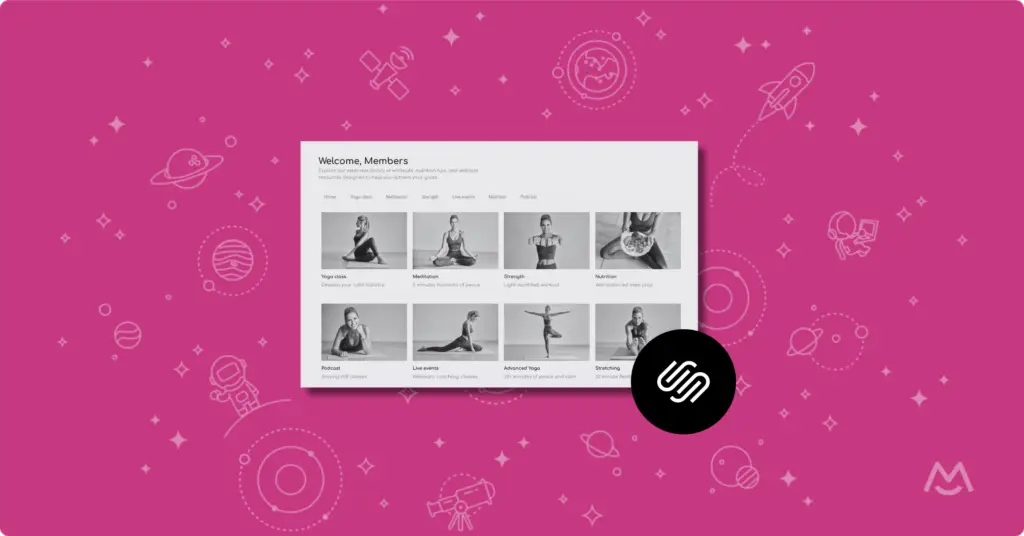
- Fitness videos for different skill levels or fitness goals
- Design templates for professionals or creatives
- Educational podcasts or how-to guides
The key to a successful content library is high-quality, valuable content. Your audience should feel that they’re getting something exclusive and useful.
Once you have your content, it’s time to organize it. A well-structured content library helps users easily find what they’re looking for. Here are some ways you can organize:
- By media type: separate videos, podcasts, templates, and other resources
- By themes: fitness topics (yoga, strength training), creative themes (branding, photography), or educational subjects
Tip: Make navigation as intuitive as possible so users can quickly locate the content they need.
Step 2: Add Your Content to Your Squarespace Website
Now that you’ve organized your content, it’s time to add it to your Squarespace website. Squarespace is perfect for this because of its drag-and-drop interface, which makes it easy to customize even if you don’t have much technical experience.
Here’s how to structure your content on Squarespace:
- Create a members-only homepage where visitors can browse your content categories.
- Add hub pages for each category, like videos, design templates, or educational podcasts.
- Create individual pages for each piece of content (e.g., individual workout videos or specific templates).
Squarespace offers a variety of customizable templates to display your content exactly how you want.

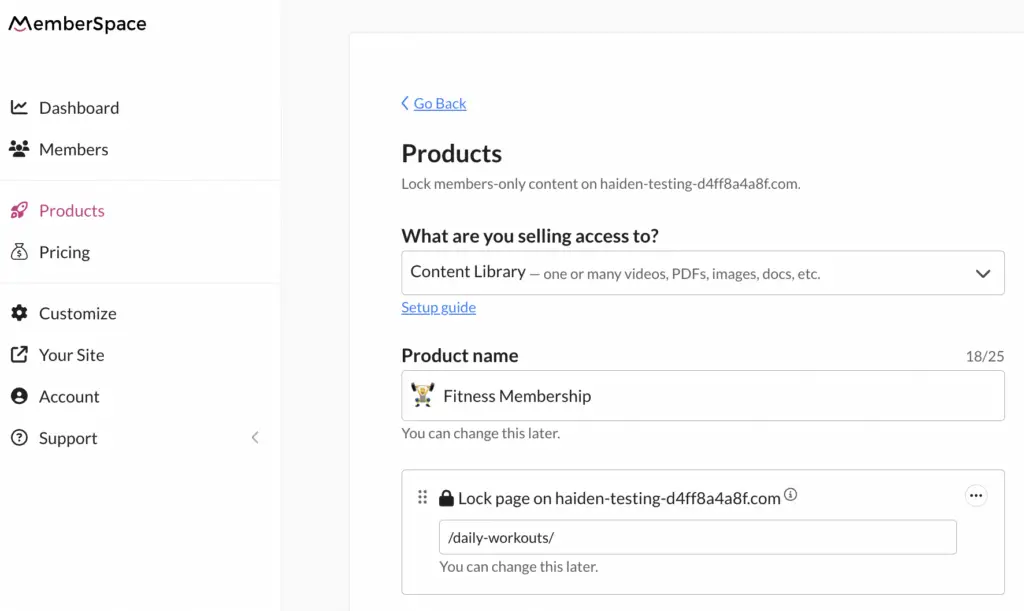
Step 3: Add a Paywall with MemberSpace
To monetize your content library, you’ll need to set up a paywall so that only paying members can access it. One of the best tools for this is MemberSpace. MemberSpace adds advanced membership features to your Squarespace site to help you generate more revenue, and it and allows you to lock specific content pages, so only those who subscribe can view your content.
With MemberSpace, you can decide which content is free and which is exclusive to paying members. This way, you can give potential subscribers a taste of your content while encouraging them to pay for full access.
Step 4: Set Your Pricing Model
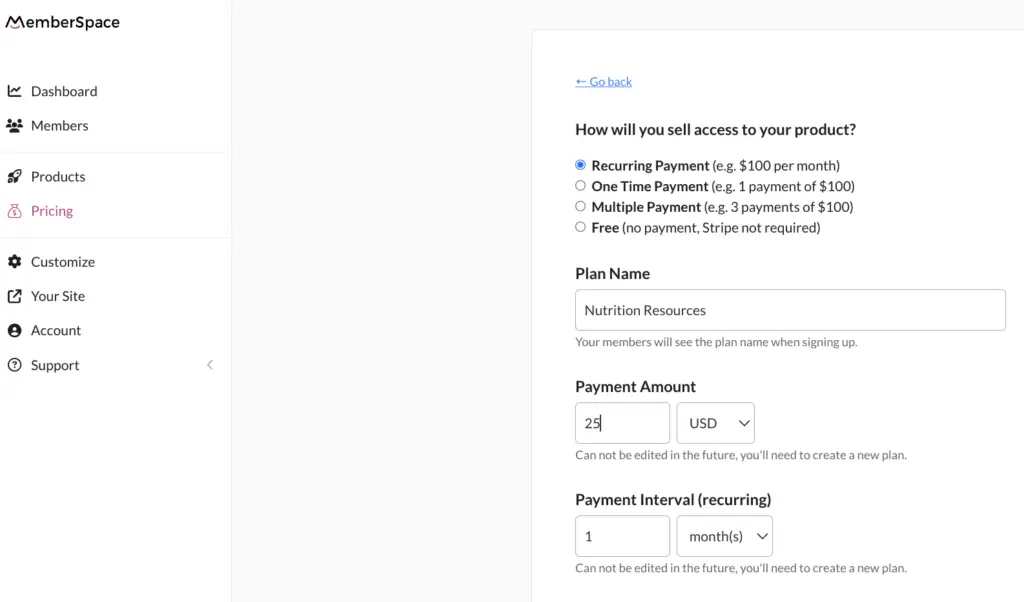
Choosing the right pricing model for your content library is important. A common model for content libraries is a recurring payment plan. This allows your subscribers to pay on a monthly or annual basis (or however often you choose) for ongoing access to your resources. Here are some pricing models to consider:
- Monthly subscription: A great option for content that you update regularly.
- Annual subscription: Offer a discount for customers who commit to a year of access.
- One-time payment: Ideal for static content libraries that won’t require frequent updates.
Make sure to consider your audience’s needs when choosing a pricing model.
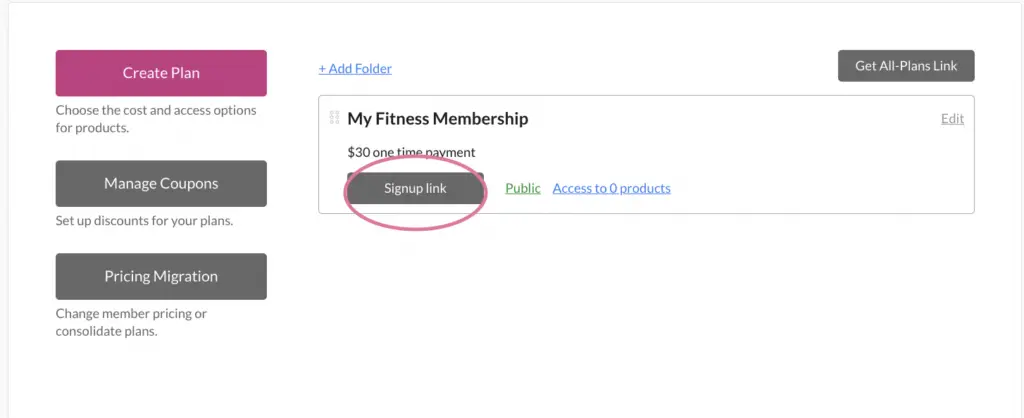
Step 5: Add a Sign-Up Link to Your Site
Once your pricing is set, you’ll need to make sure your sign-up process is clear and easy for potential members. This means adding a sign-up link to call-to-action buttons on your website. The easier it is for visitors to find and access your content library, the better your chances of converting them into paying members.
Here are some places to add your sign-up CTA:
- On your homepage
- In your website’s navigation menu
- On multiple pages throughout your site
Keeping Your Content Library Fresh
After launching your content library, it’s important to continue adding new content and updating older material. This not only keeps your existing members engaged but also justifies a higher price over time as the library grows. Subscribers will appreciate fresh, high-quality content, which can lead to longer membership retention.
Here are a few ways to keep your content library fresh:
- Regularly upload new resources, such as videos, templates, or guides
- Update existing content to keep it relevant
- Offer exclusive bonus materials to paying members
Final Thoughts
Selling a content library on Squarespace is a fantastic way to monetize your digital products and grow your online business. With the right tools and strategy, you can create a seamless experience for your audience while generating recurring revenue.
Remember, success comes down to three main things: creating high-quality content, organizing it well, and making it easy for people to pay for access. If you’re ready to turn your digital content into a profitable library, follow the steps outlined above to get started today.

Need help setting up your content library?
Connect with our friendly team, weekdays 10am - 6pm ET.
Let's chat!
