It’s no secret that Notion’s popularity is growing due to its simplicity and flexibility. You can use Notion to publish tutorials and online courses, either by inviting people to a private workspace or sharing your pages publicly.
But until now, there hasn’t been an easy way to put your content behind a paywall and charge for access. Now, with MemberSpace, you can turn your Notion pages into a membership site, private community, or online training course, accessible only to logged in members.
In this guide we’ll tell you everything you need to know about creating a Notion membership site. So let’s get started!
What You’ll Need
- A free Notion account (sign up here)
- A MemberSpace account (sign up for free)
- A free Stripe account (sign up here)
- A paid Super account (sign up here)
- A domain for your Notion site e.g. yourwebsite.com
Launch a Notion membership site!
The easiest way to accept membership payments or one-time charges for digital products like podcasts, online courses, communities, content libraries, and more — all from your own website!
Get started for free! 5 minutes to set up.
Table of Contents
How to build a Notion membership site in under 1 hour
Whether you’re a beginner or experienced user, this step-by-step guide has you covered! In this video, you’ll learn to build a Notion membership site from start to finish including integrating memberships and mastering Member Space setup, using Super.SO features, and styling CSS.
Step 1: Setup your Notion site in Super
Super is a third-party tool which allows you to:
- Host your Notion site on a custom domain e.g. yourwebsite.com
- Use ‘pretty URLs’ for each Notion page e.g. yourwebsite.com/members
- Install MemberSpace code on your Notion site
You’ll need to make your Notion pages public before you can lock them down with MemberSpace. Don’t worry, once we’re done, only your members or customers will be able to access those pages.
In Notion, you should create a hierarchical page structure i.e. have one top-level page e.g. members home page and then create sub-pages with all your other content below that top-level page.
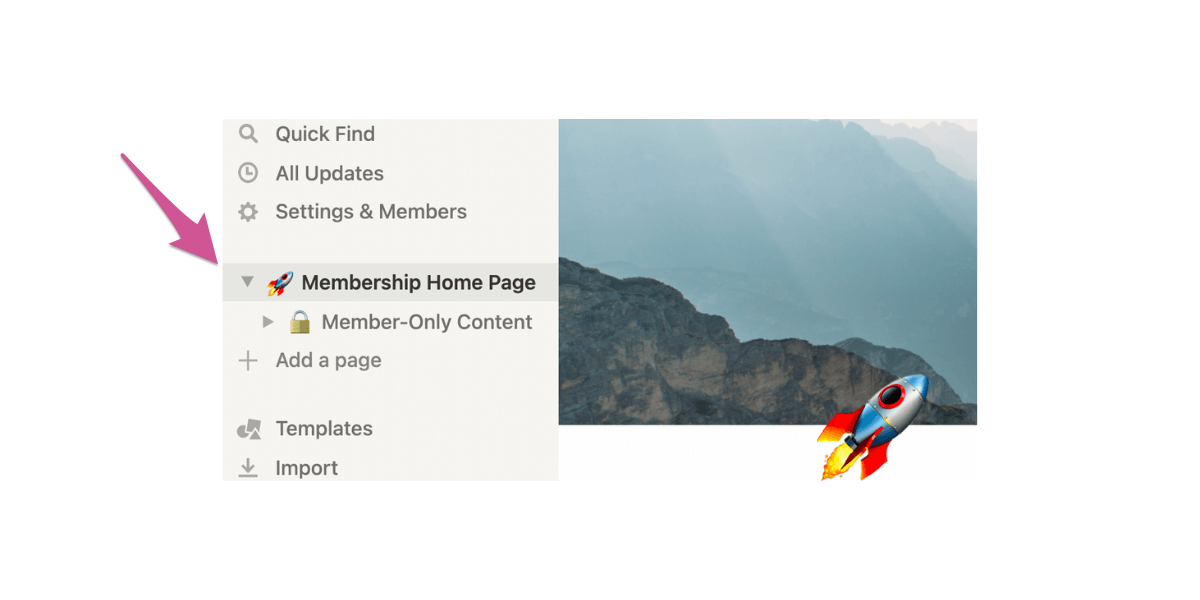
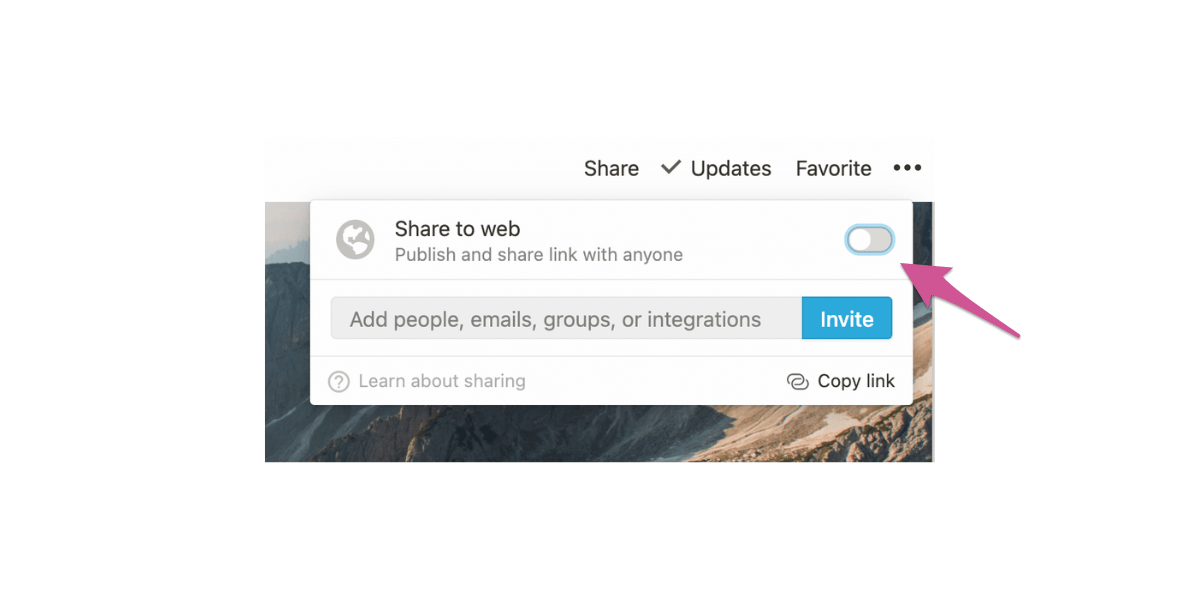
Make your top landing page public in Notion’s settings by clicking “share” in the upper right-hand corner of your screen. Next, toggle on the “share to web” option.
In the menu that opens up, toggle the “allow duplicate as template” to off.
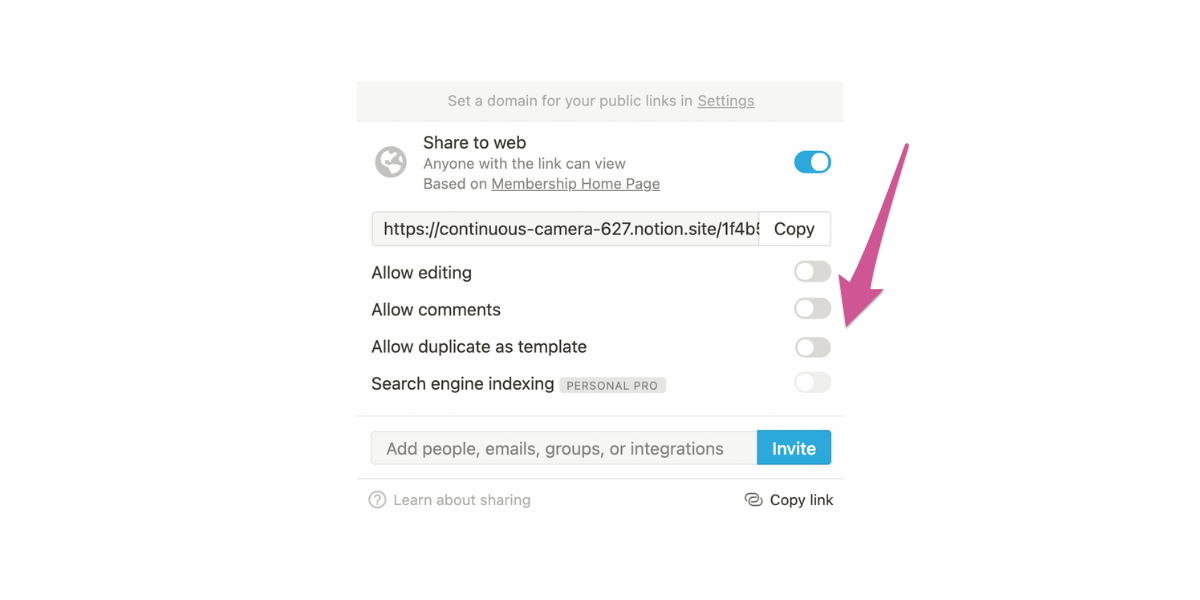
This will make all of your subpages public, too, but not for long. We’ll be protecting those subpages with MemberSpace and Super.
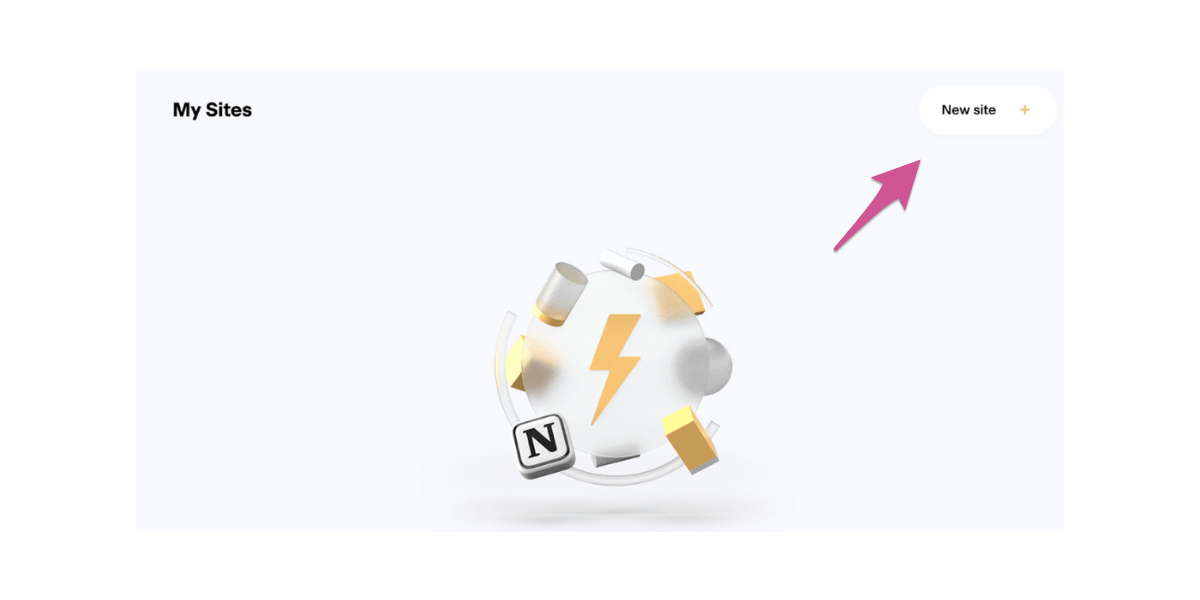
Log into Super and click “Sites” in the left-hand menu.
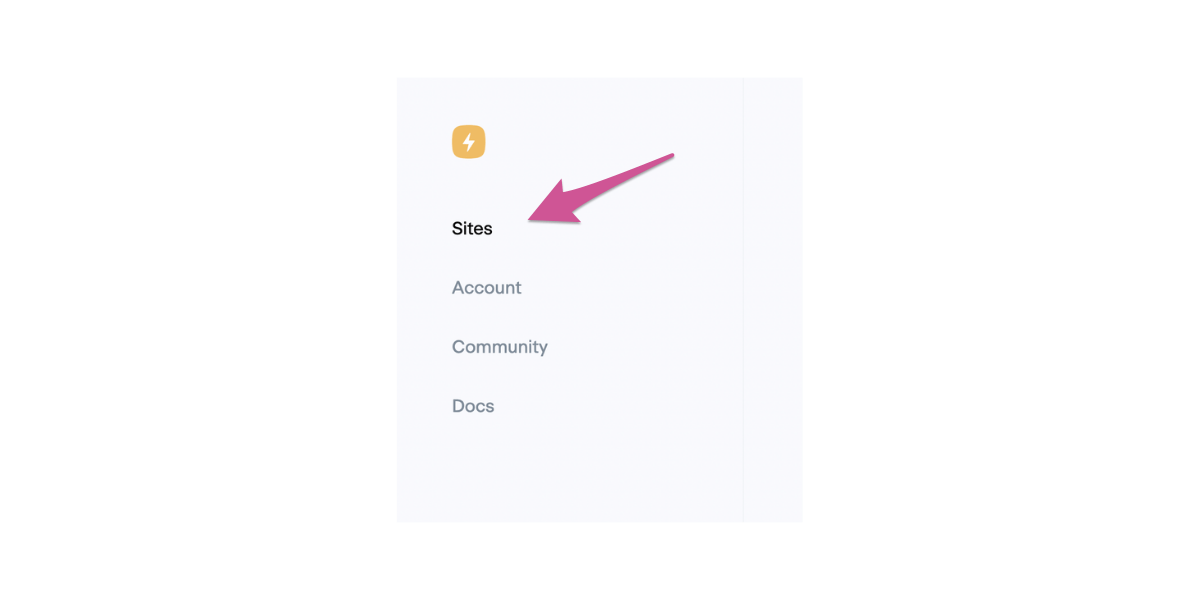
Next, click “New Site” in the upper right-hand corner.
Go back to your Notion workspace and copy the public URL we created in step one (it’s in the share menu!) Then, paste it into Super and give your site a name.
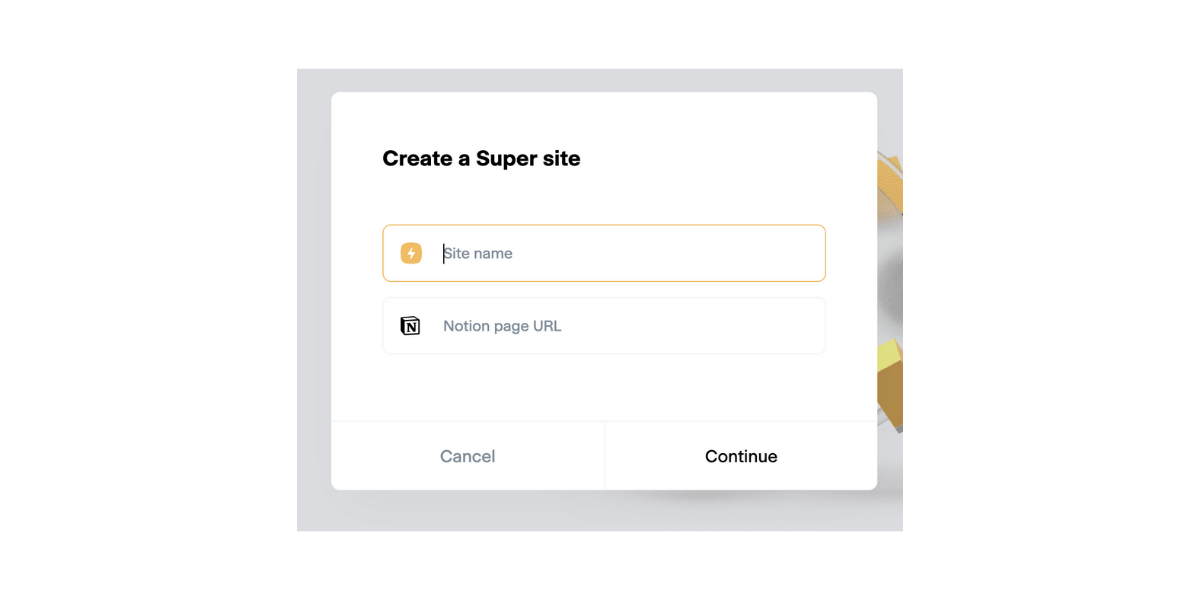
You’ll notice that Notion links are, by default, long and full of numbers. Don’t worry — Super turns all your Notion URLs into nice, pretty links using your custom domain.
Click continue to advance to the next step. You’ll now see a preview of your site in Super, with a menu along the left.
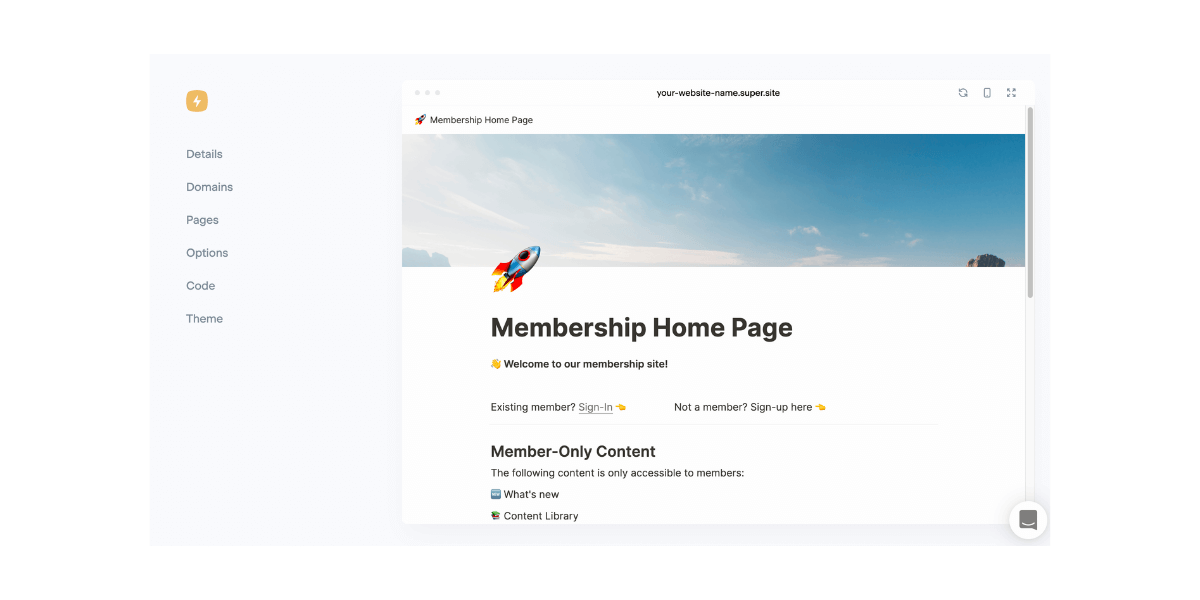
Click “Domains.”
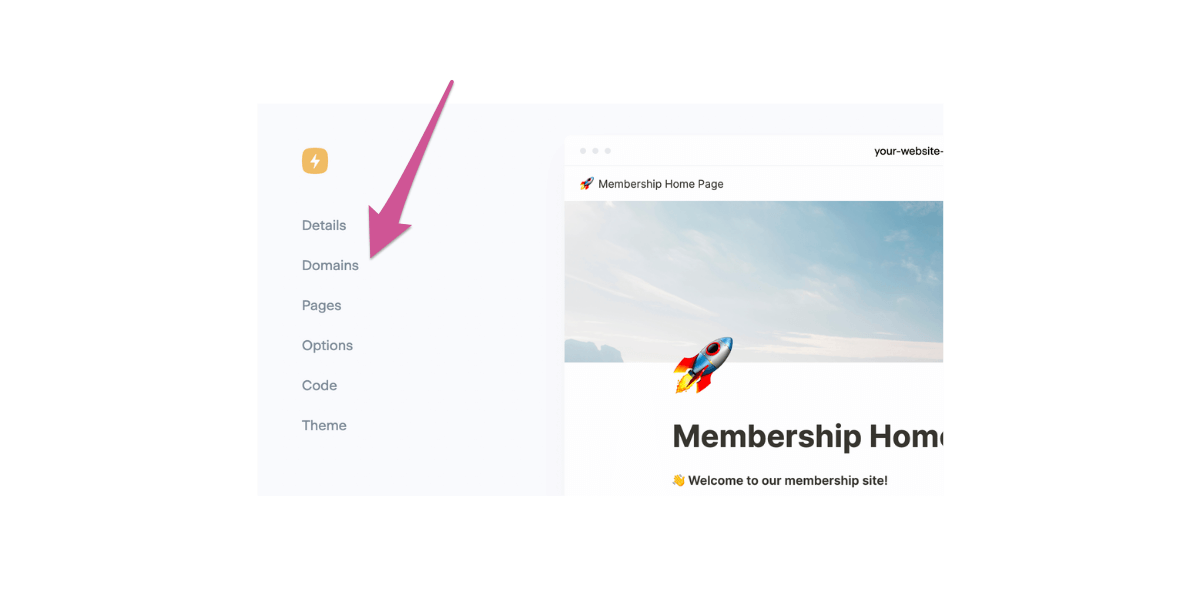
Click “Add a Custom Domain.”
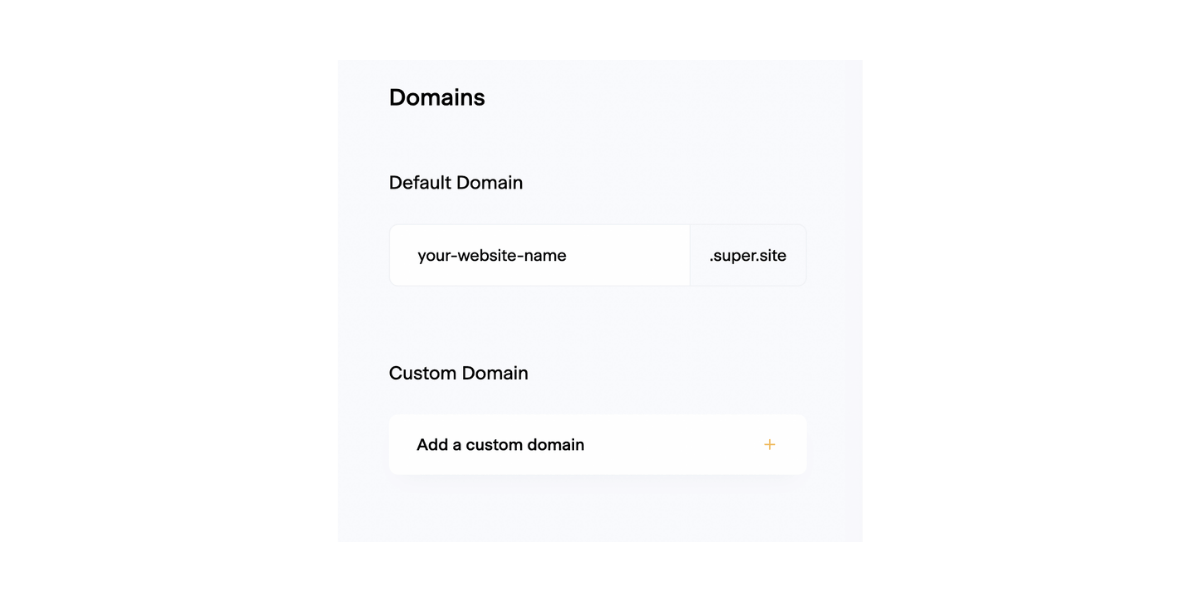
Follow Super’s steps to finish connecting your domain to their service. You will need to add another CNAME record and an A record to your domain that points to your Notion site — your registrar can help with this as well if needed.
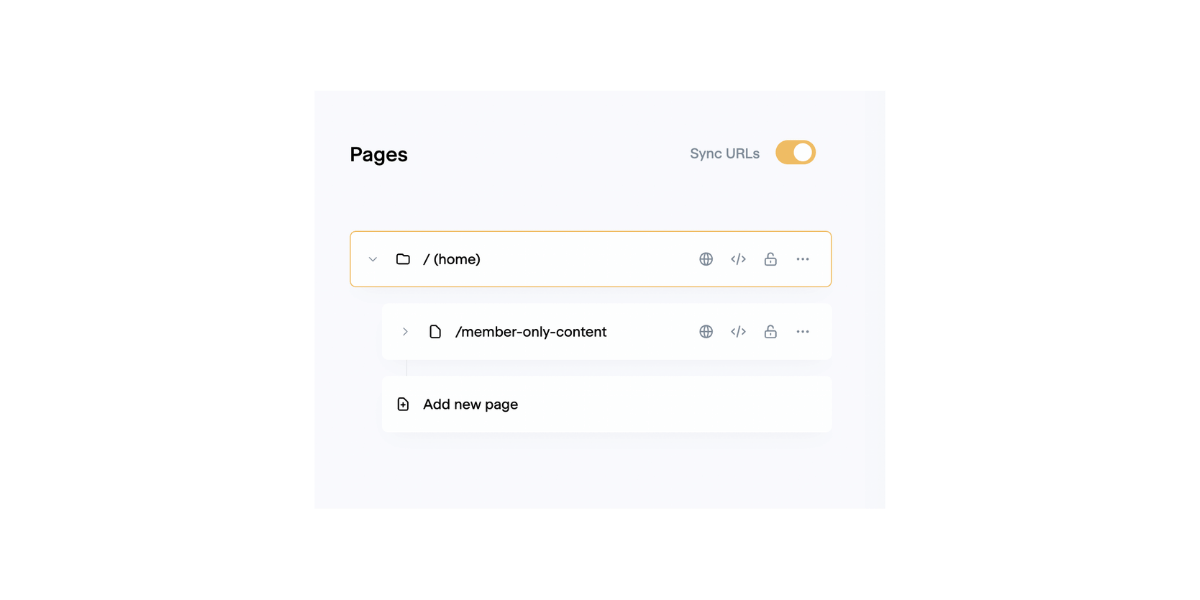
Once your domain is connected, Super will take the names of your Notion pages and turn them into pretty URLs that are easy to link to. They’ll look something like this:
https://notion.yourwebsite.com/member-only-content
Click “pages” in your Super sidebar to check your new URLs out.
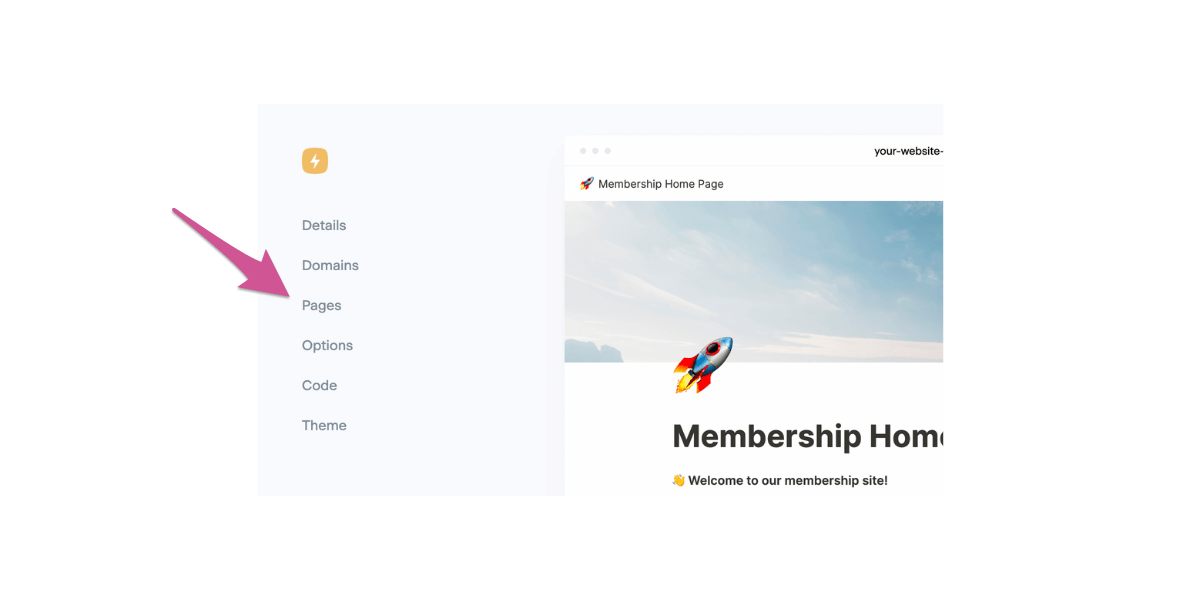
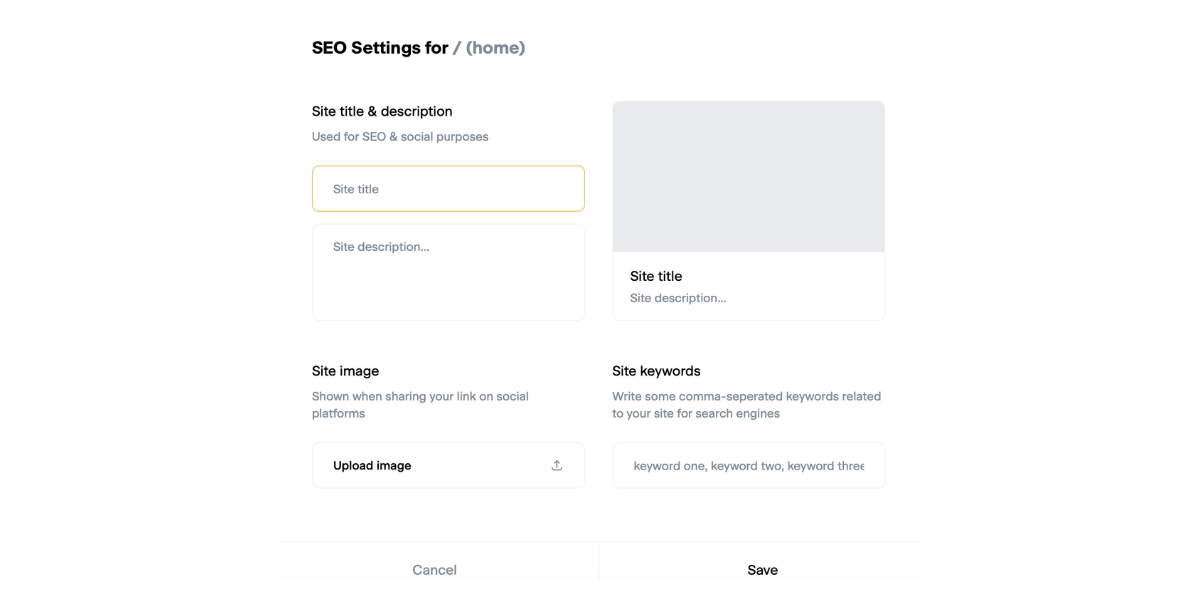
Click the globe icon next to any page name to open up your SEO settings.
In the box that pops up, you can enter information into several fields.
- Site title and description: this is what will show up in search engine results.
- Site image: this image serves as a preview for shared links.
- Keywords: additional phrases and words associated with your website — think of things people might be likely to search for online that relate to your downloads.
Step 2: Setup your Notion site in MemberSpace
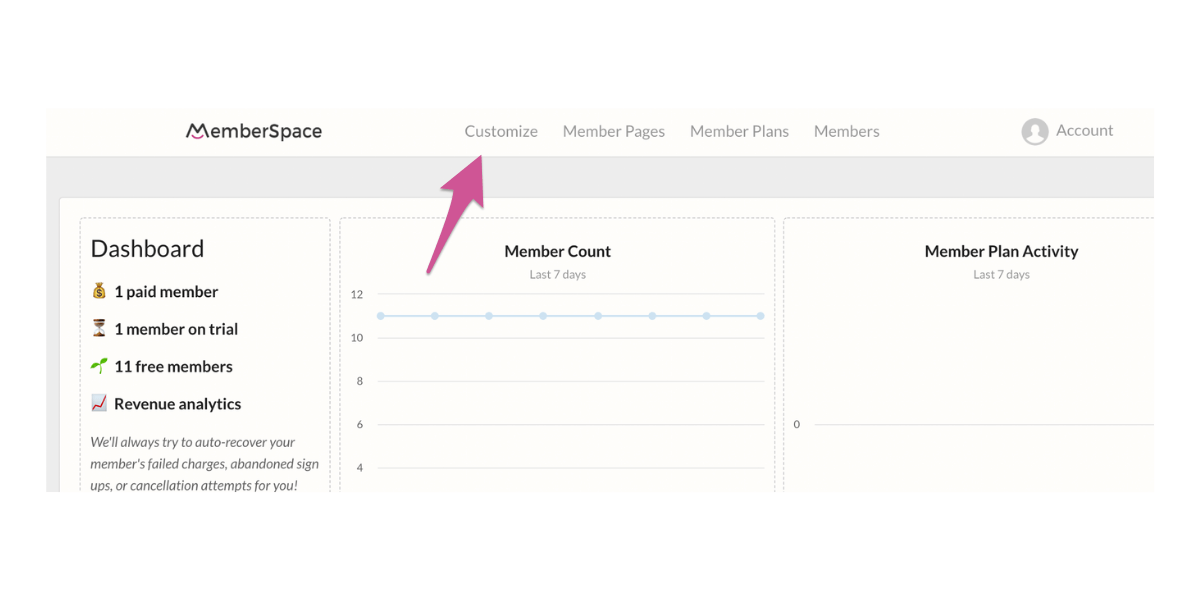
Go to your MemberSpace dashboard and click “Customize” at the top.
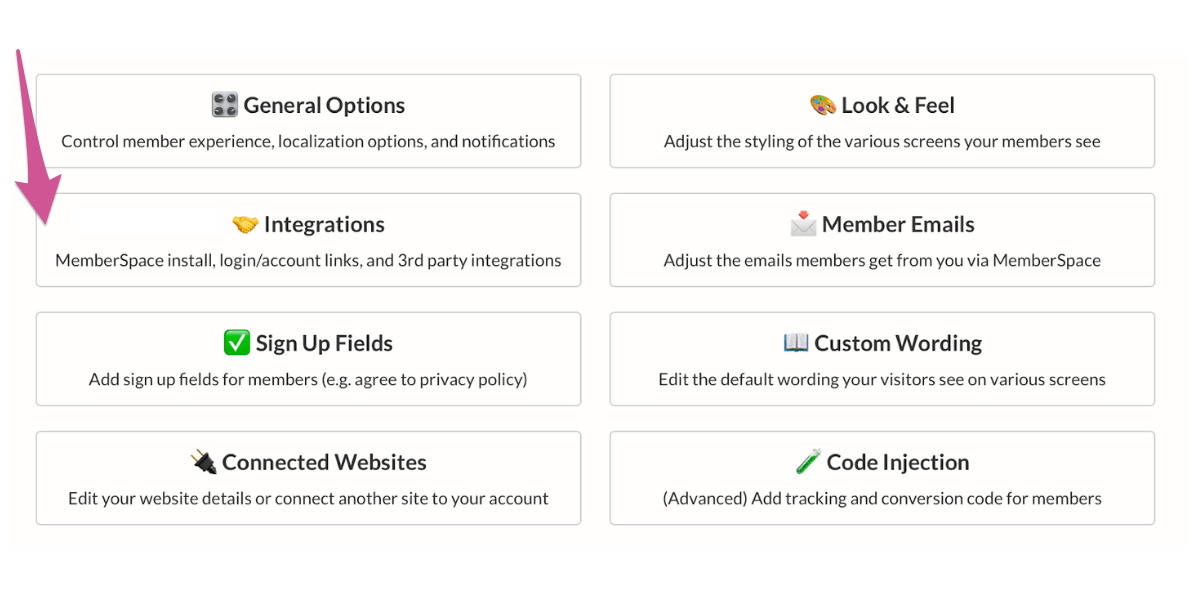
Next, click “Integrations.”
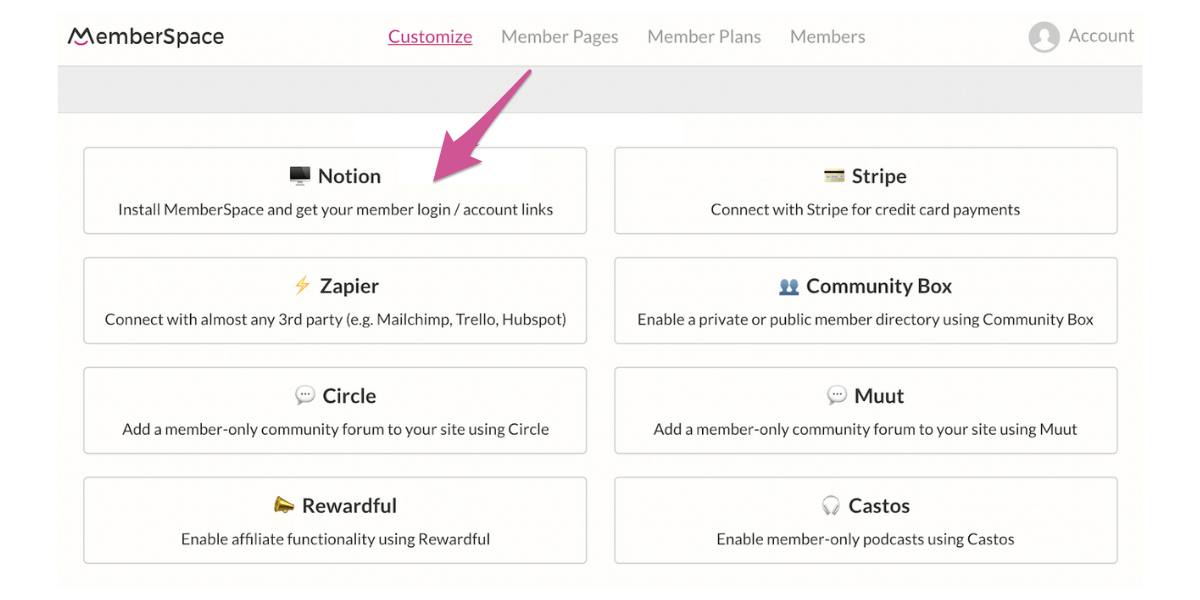
Click on “Notion.”
Under the section that says “100% Required Install Code,” click the pink button to copy it all.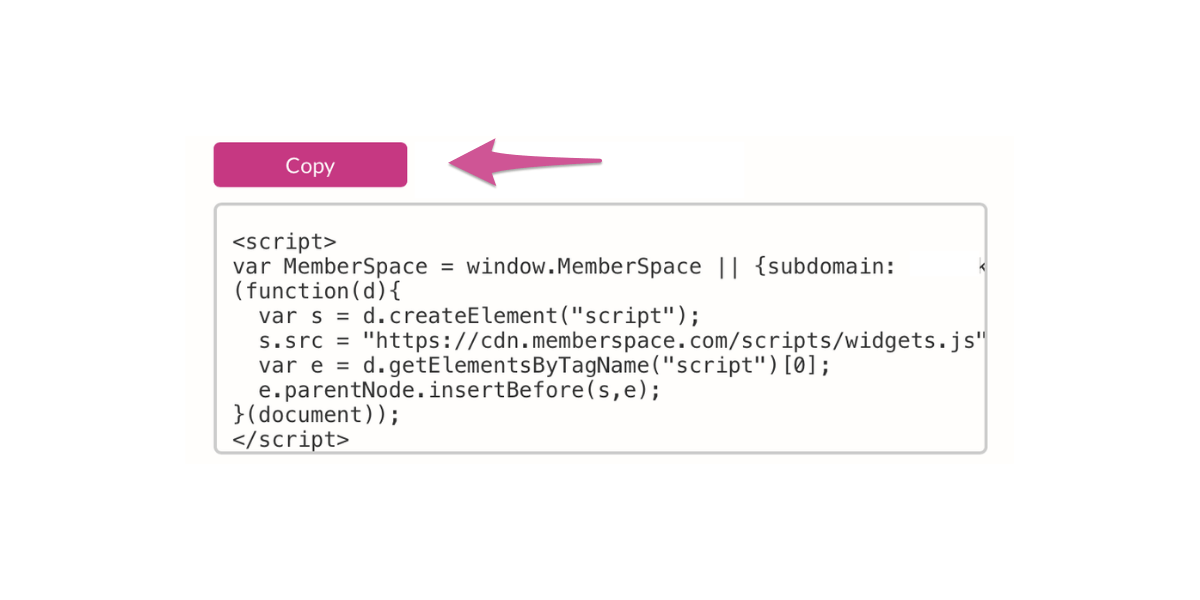
Below this code, you’ll see a checkbox labeled “Display a Login/Account button.” Keeping this box checked will add a convenient login button to your site for returning members. If you don’t want the login button, you can uncheck this box, but you’ll need to add a login popup instead.
Go back to the Super dashboard. Click the gear icon next to the preview of your Notion site. Next, click “options” in the left-hand sidebar.
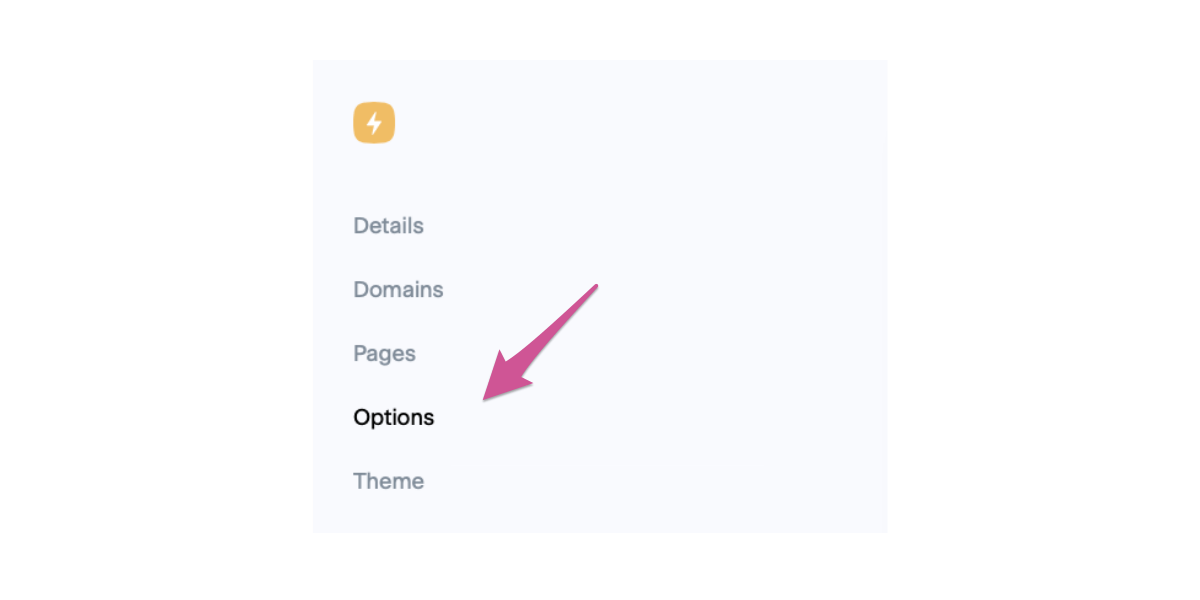
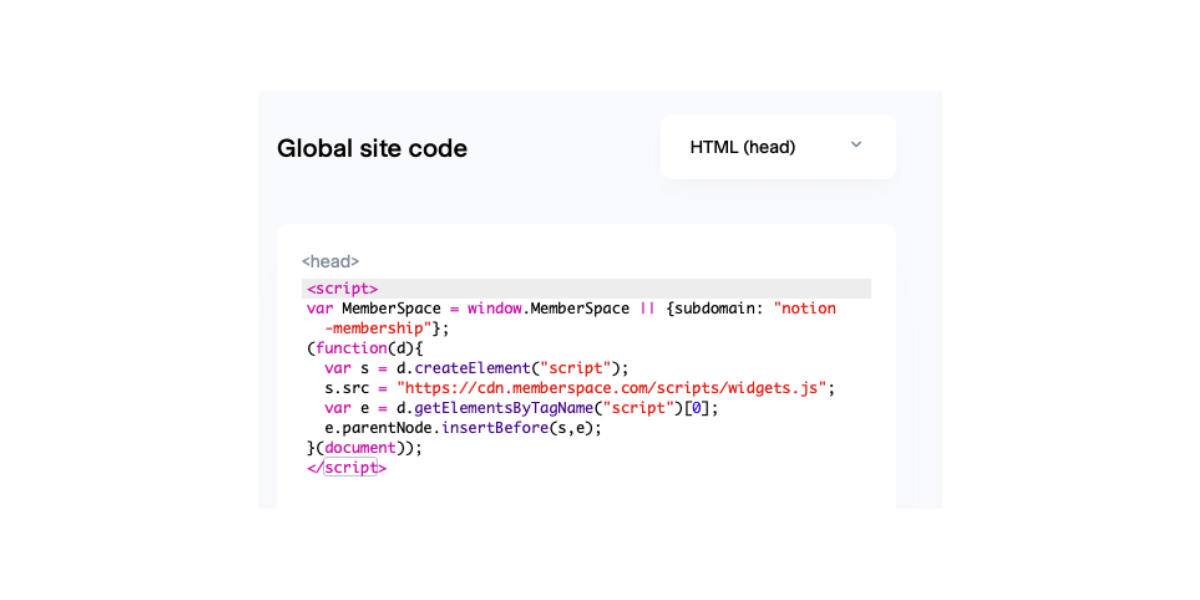
Under “Global Code Injection,” click “edit code.” Make sure the drop-down menu says “HTML (head)” and paste the code from MemberSpace in the box.
Step 3: Setup your member plans in MemberSpace
Now we’ll set up the member plans that your prospective members can join. Member plans are how you choose the cost and terms for accessing your member-only content e.g. a 14-day trial and then $25 per month.
You can create as many member plans as you like. But to get started, we’d recommend keeping these simple e.g. a monthly plan and/or an annual plan.
Learn more about how to set up your member plans.
Step 4: Add your member only pages in MemberSpace
Now we’re ready to add our member-only pages to MemberSpace! As the name implies, member-only pages can only be accessed by your members when they’re logged into your Notion membership site.
If a non-member tries to access your member-only pages, they’ll be asked to log in and/or signup for one of your member plans before they can access the content.
To lock down a member-only page, just go into the MemberSpace backend and enter the URL of the page e.g. ‘https://yourwebsite.com/members’ and then select the member plans that can access each page.
Here’s a short post that shows you how to add your member-only pages.
Important: Make sure you enter the pretty URLs that you created in Super, NOT the native Notion URLs.
Step 5: Setup your signup and login forms on Notion
Next, we need a way for people to signup for your member plans.
In the MemberSpace backend, go back to Member Plans and click the Get Sign-Up Link button for one of your member plans.
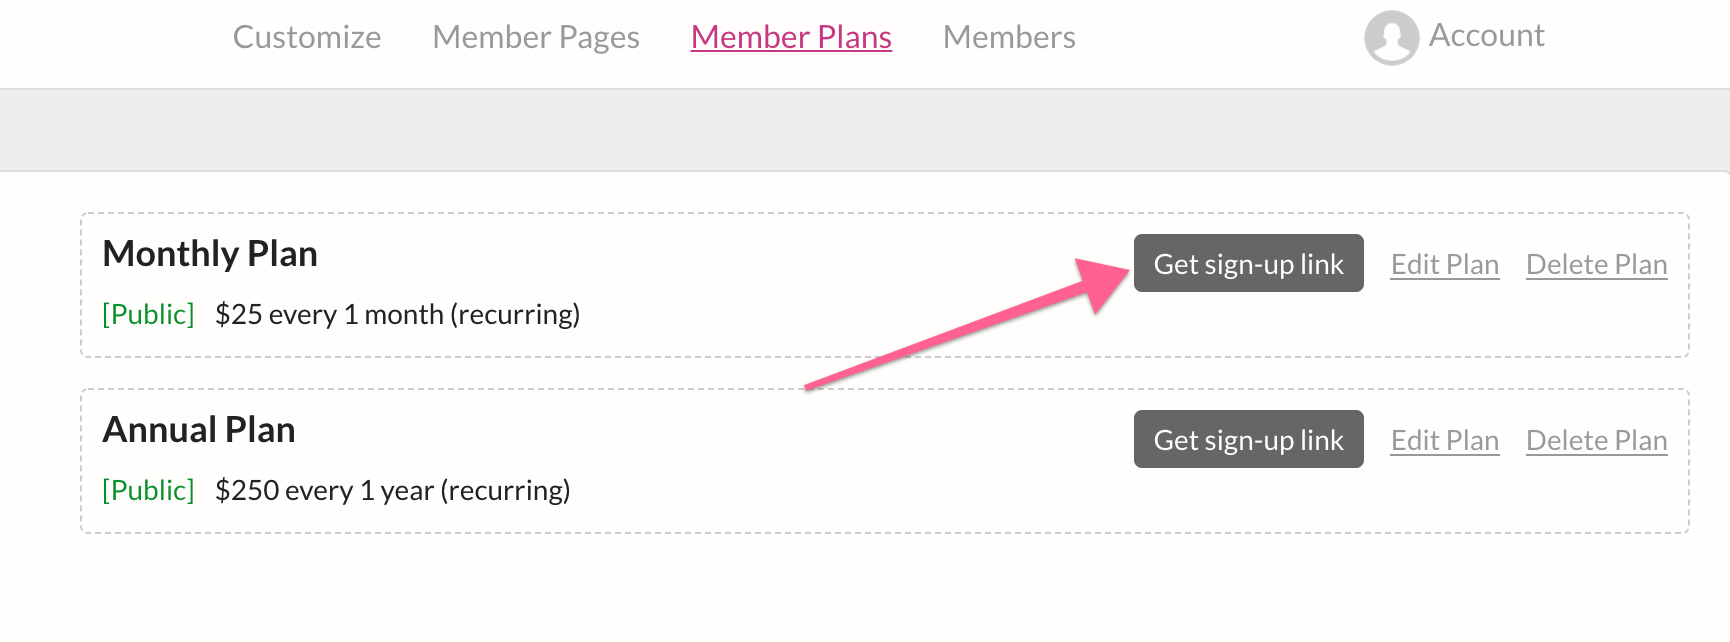
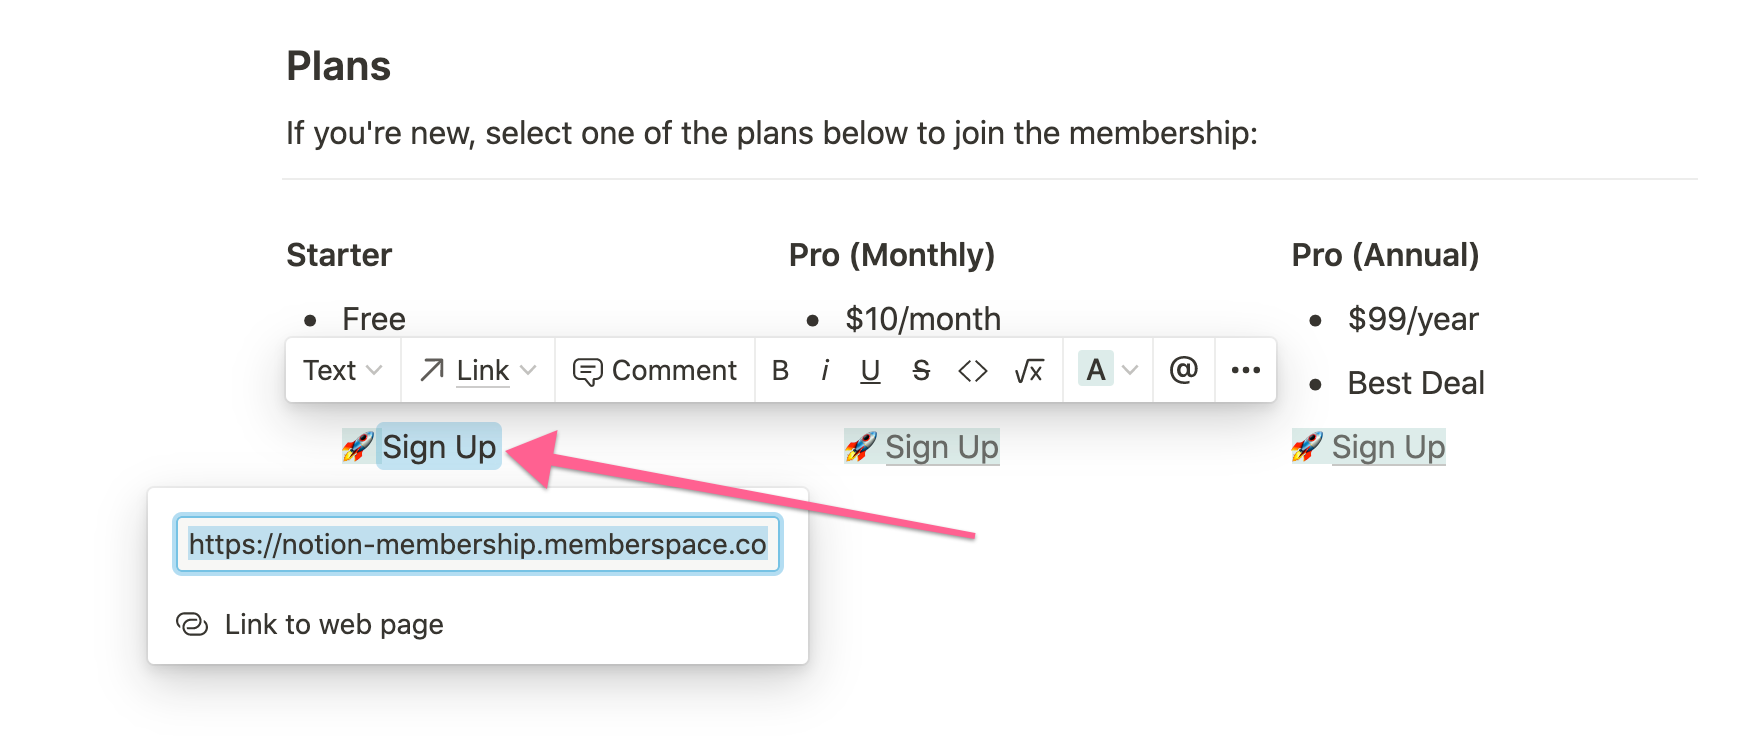
Then simply go back to your Notion site and paste this sign-up link on the page you’d like people to sign up from.
Your members will also need a way to log into your membership every time they visit your site. The easiest way to do this is is by adding a Login/Account popup.
You can add the Login/Account button so it automatically shows up on every page of your Notion site, or you can add it to a specific page or location e.g. your header menu.
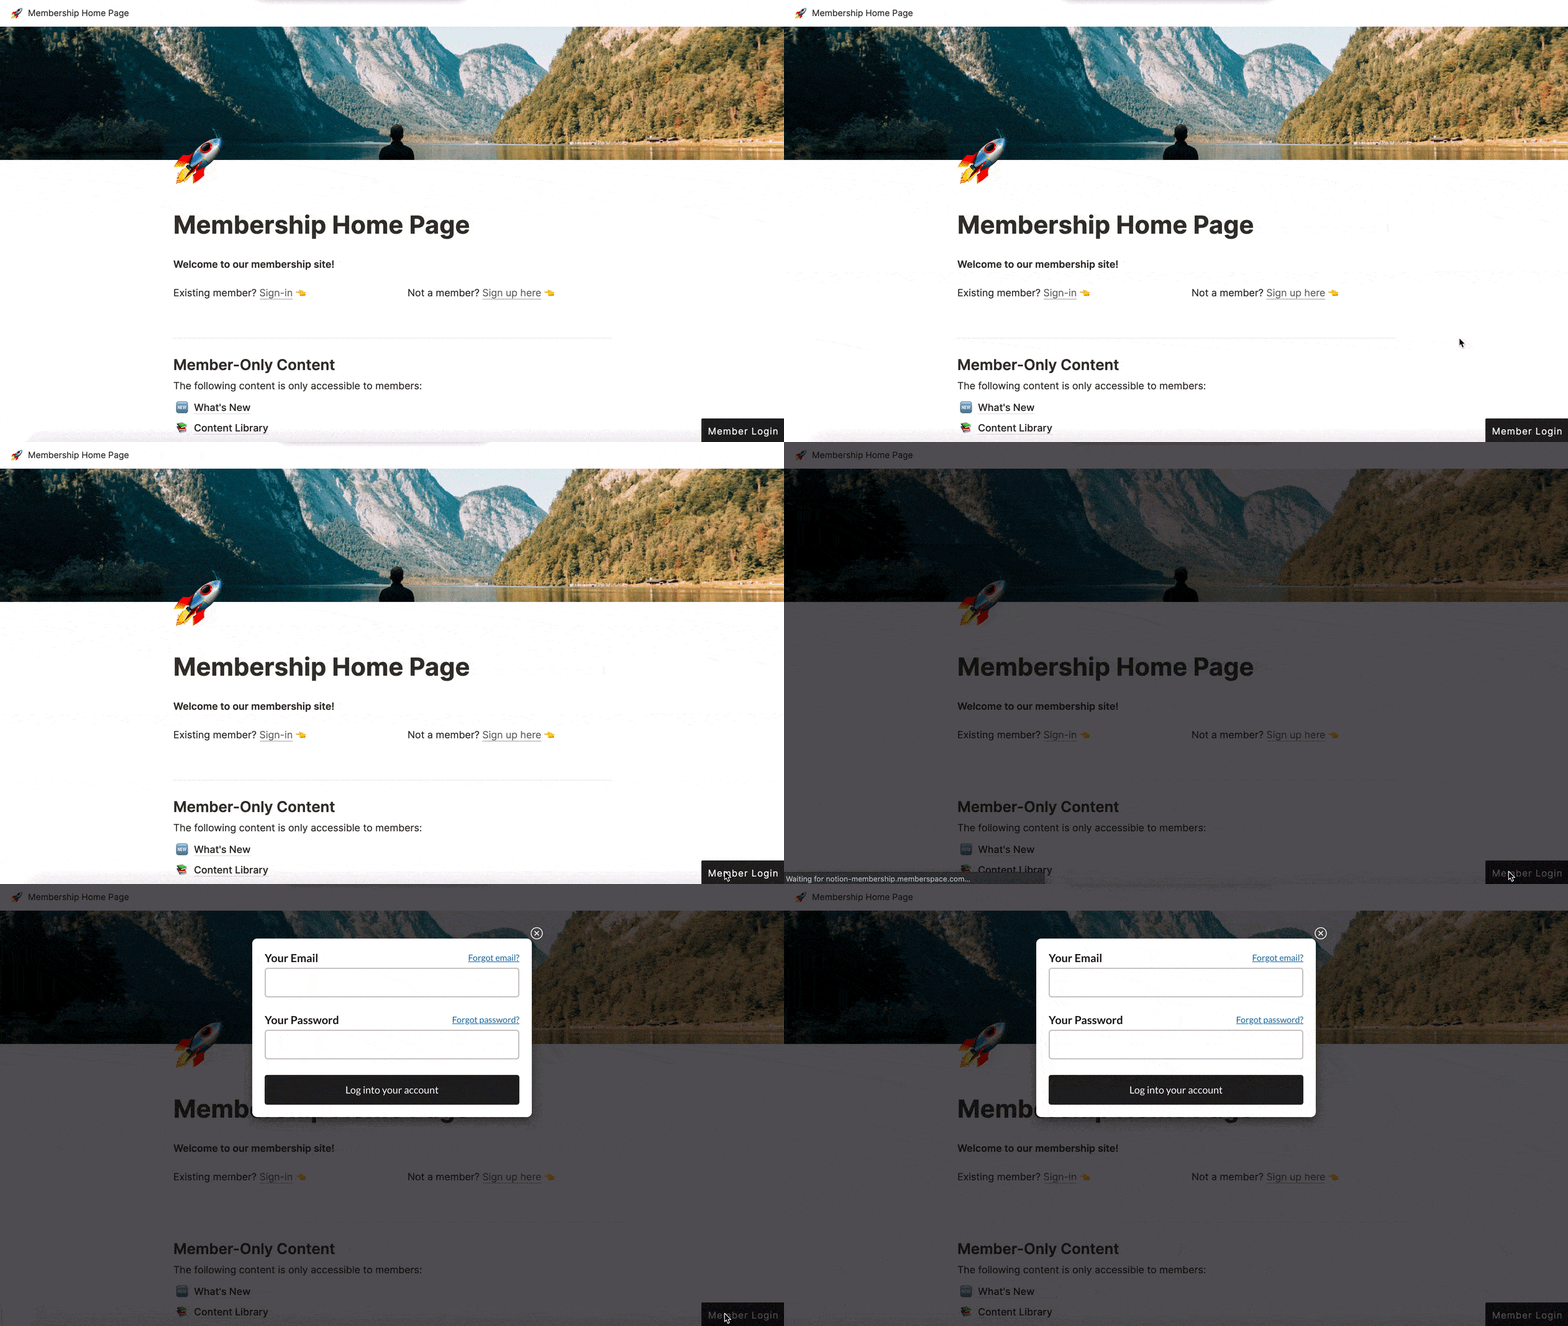
When members are logged in, the button link will change to a “Your Account” link so your members can change their email, update their credit card, cancel their subscription, etc.
Here are step-by-step instructions to add a login/account popup to your site.
Step 6: Install MemberSpace on your Notion membership site
Next, we need to install MemberSpace on our Notion site. There isn’t way to do this directly in Notion so we’re going to install MemberSpace via Super.
Remember the final step in the Super setup that we skipped? Well, now’s the time to go back and complete that step.
Here are step-by-step instructions to install MemberSpace on Notion via Super.
Step 7: Customize and test the member experience
Finally, we’re ready to enhance the look and feel of your Notion membership site. You can customize all MemberSpace forms and buttons to match your Notion site’s design, ensuring a cohesive experience. Additionally, you can tailor all the automated emails from MemberSpace, such as those for sign-ups, password changes, and payments.
Here’s a guide to the five most popular MemberSpace customizations for those of you who want to take your Notion site to the next level.
✨ Business Tip: Remember to thoroughly test your membership site before launching to ensure a seamless experience for your members—here’s a guide to help you test your member experience and plans!
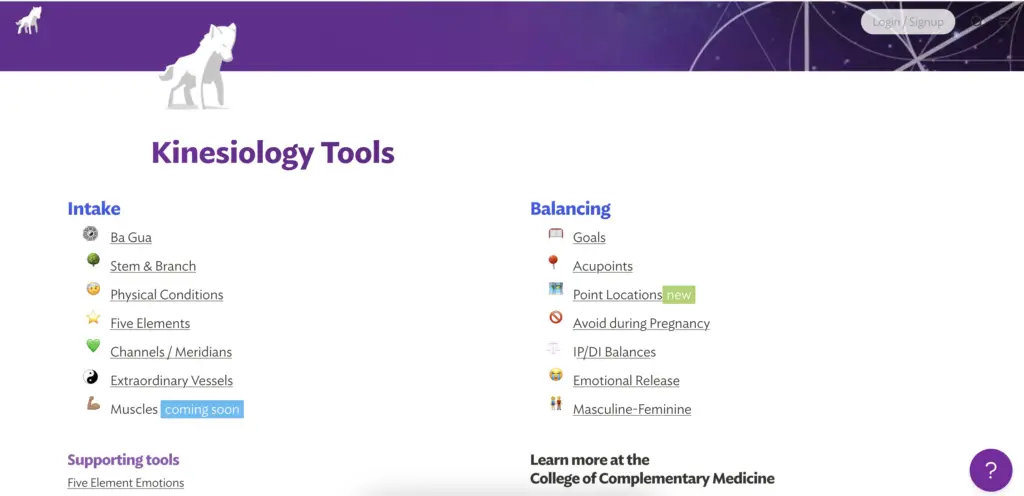
Notion membership site examples
The examples below showcase how you can use MemberSpace to transform a simple Notion workspace into a fully functional, paid membership platform. They also demonstrate how creators and businesses have easily monetized their Notion content, offering subscribers exclusive access to valuable information and resources while turning Notion into a profitable venture.
Takoda
Notion Membership Site – FAQs
Can you use Notion for a membership site?
Yes, you can use Notion for a membership site. While Notion doesn’t have native membership features, you can integrate it with MemberSpace to manage memberships and payments. MemberSpace allows you to gate content, set up member-only areas, and handle subscriptions seamlessly with Notion.
Can I monetize my Notion website?
Yes, you can monetize your Notion website. By using tools like MemberSpace, you can create paid membership tiers, gated content, and handle payments directly through your Notion site.
Can you paywall a Notion page?
By using third-party tools like MemberSpace, you can restrict access to certain Notion pages and require payment for entry. These tools integrate smoothly with Notion, allowing you to manage memberships and payments efficiently.
Can I sell digital products on Notion?
By using membership tools like MemberSpace, you can link your Notion pages to product listings and handle payments. These integrations make it easy to offer and manage digital downloads like e-books, templates, online courses, and digital art.
Can I build an online community with Notion?
Yes, you can create member-only areas, forums, and discussion boards. These integrations allow you to manage memberships, content access, and interactions, building a vibrant online community directly within Notion.
Can I set up a podcast with Notion?
Notion isn’t designed to host or distribute podcasts directly. However, you can use it to organize and plan your podcast episodes, show notes, and schedules.
For hosting and distributing your podcast, you’d need to use platforms like Anchor or Libsyn. If you want to host private podcasts, you can use MemberSpace to restrict access and manage subscriptions, linking the private episodes from your Notion pages.
Final thoughts
This guide only covers the basics of creating a Notion membership site but there is so much more you can do with it. With MemberSpace, you can use our advanced features to help you enhance your site even further. You can even explore options like selling digital products such as newsletters and podcasts to expand your offerings!
For more resources on marketing and selling digital products and memberships with MemberSpace, visit MemberSpace University — our comprehensive hub with step-by-step guides, educational videos, and valuable tips. If you have any questions after starting your free trial, feel free to reach out!

Need help setting up your online course?
Connect with our friendly team, weekdays 10am - 6pm ET.
Let's chat!
