Haiden Hibbert
Are you thinking about starting a paid online community? Or maybe you already have a thriving community on Instagram, Facebook, or another platform – and you’re looking for ways to monetize it.
Selling access to a private community is a great way to earn recurring revenue while providing value to your most engaged followers. But where do you even start?
In this post, we’ll walk through the step-by-step process for selling access to a private community using Notion. Whether you’re building a community from scratch or want to turn your existing social following into additional income, this guide will show you exactly how to do it.
Launch a private Notion community!
The easiest way to accept membership payments or one-time charges for digital products like communities, online courses, content libraries, and more — all from your own website!
Get started for free! 5 minutes to set up.
Table of Contents
Step 1: Pick your community platform
If you have a dedicated following on another platform, it often makes sense to meet your audience where they already are and sell access to that group. This is much easier than trying to get people to engage with a brand new platform.
For example, if you have a Facebook Group with tons of members, you’ll use your Notion website to promote and sell access to the group.
A few popular options for community groups include:
- Facebook Groups
- Private Instagram
- LinkedIn Groups
- Private Slack Channel
Step 2: Create your community website with Notion & Super
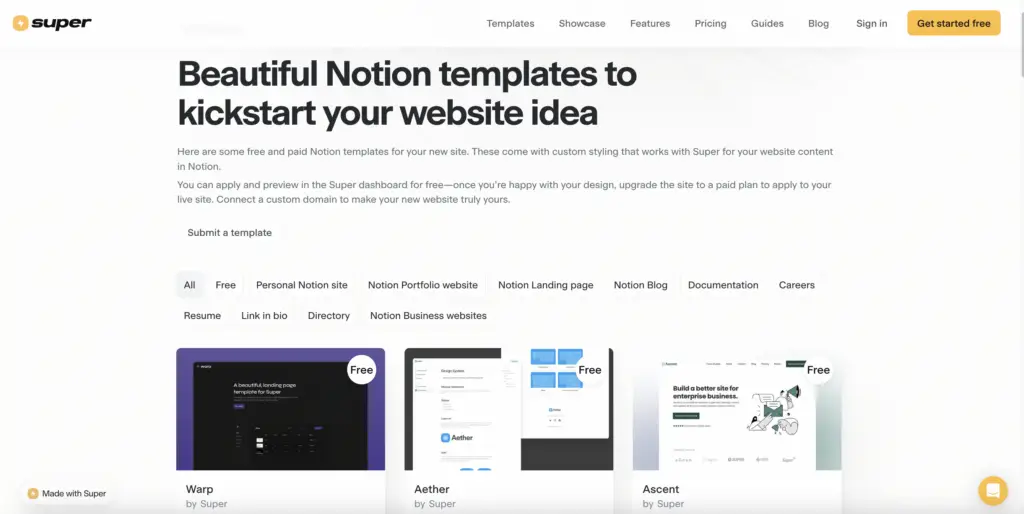
To build your community website, you’ll want to use Notion and Super. Notion provides a flexible workspace to easily create any kind of content and pages. Super then takes that Notion workspace and turns it into a professional, public-facing website.
Together, they are the perfect combo for easily setting up a community site. Here’s how it works:
- Start by choosing a website template from Super.
- Customize the template by swapping out text, photos, fonts, colors – anything you want. Notion makes it simple.
- When your site looks just how you want, go back to Super and paste the URL of your Notion workspace. This will instantly publish your site.
Now you have a professional community website that you can continue editing anytime. And all the changes sync automatically from Notion to your live Super site. It’s incredibly fast and efficient for creating an online community hub!
Step 3: Integrate MemberSpace with your community platform
Now comes the most important step: integrating MemberSpace with your private community platform to control member access.
Here ‘s the process:
- First, make sure your Facebook Group, Slack, or whatever platform you chose is set to “private” so that only members you add can join.
- Next, create a landing page on your Notion/Super site for your private community access. Add the link for members to join the group.
- Add the URL of your Notion landing page to MemberSpace which password protects it and requires a paid subscription to view.
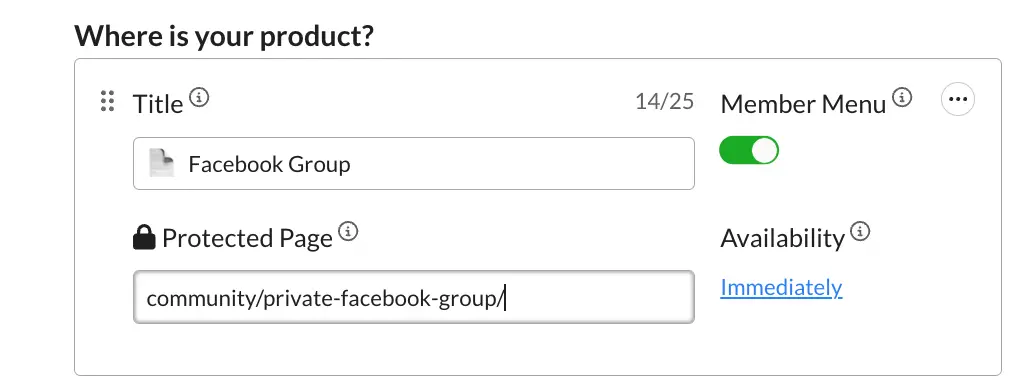
Now when someone purchases access to your community or group on your site, they will be able to click through to join the private group, but the landing page will be locked behind MemberSpace requiring an account.
You then have two options for how to actually give them access to your private community platform:
Option 1: Have new members request to join your private group after purchase, and you manually approve each one.
Option 2: Directly invite members to the private group after they sign up through MemberSpace.
Choose whichever works best based on the platform you chose. The key is that the entire process – from purchase to access – is seamless for your members.
Step 4: Set up a paid subscription
Once you’ve locked your community pages on your website, you’ll need to set up your pricing. MemberSpace makes the technical parts of getting paid very simple with the built-in Stripe integration. You can accept payments via credit card, Apple Pay, and Google Pay.
- Select Pricing > Create Plan in your MemberSpace dashboard.
- Set the billing details, like payment amount, billing frequency, and billing date.
Step 5: Add signup offers to your website
To start selling access, you need to add the unique sign up link from MemberSpace anywhere you promote the community on your Notion/Super site.
This could be:
- A dedicated sales page with pricing details and benefits
- A popup when visitors first land on your site
- A banner/link in the header or footer navigation
- A button on any page/blog post related to the community
The signup links make it easy for visitors to purchase access and create an account on your site in just a few clicks.

Step 6: Market your community
Once everything is setup, it’s time to spread the word! Here are a few ways to promote your paid community:
- Email your current contacts and followers
- Promote it on your social media accounts
- Run targeted ads to your niche audience
- Partner with influencers/brands who also serve your target members
- Offer a limited time sale or special discount as incentive to join early
The goal is to get the word out and explain why members will find lots of value in your unique community!
Final Thoughts
Selling access to a paid community on your own website gives you full control, recurring revenue, and the ability to expand your offerings over time.
With the right tools like Notion, Super, and MemberSpace – setting up a paid community site is easier than ever.
The key is creating a high-quality community that members feel is totally worth the price. Keep providing incredible value, listen to feedback, and your community will thrive!
Want to learn more about launching and managing a successful membership community? Check out the courses on MemberSpace University for tips to attract, engage, and retain paying members.
Need help with your private Notion community?
Connect with our friendly team, weekdays 10am - 6pm ET.
Let's chat!
