I'm a Content Manager at MemberSpace helping entrepreneurs and creators sell digital products.
Want to charge for access to your Discord server? While Discord offers server subscriptions, there’s a big catch — they take 10% of your earnings. That’s a pretty steep cut, especially if you’re trying to grow a paid community.
A better option? Sell access through your own website using MemberSpace. You keep way more of what you earn, plus you get full control over pricing, payments, and your subscriber list.
Here’s how to set up a paid Discord server in just a few minutes.
Launch a paid Discord server!
The easiest way to accept membership payments or one-time charges for digital products like communities, online courses, content libraries, and more — all from your own website!
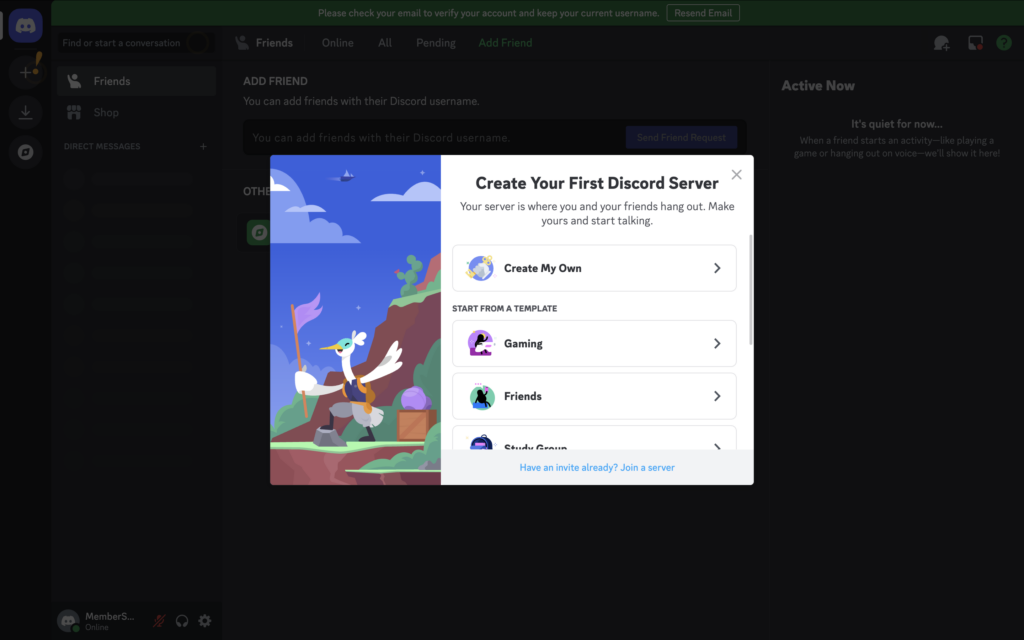
First, you need to set up your Discord server, which will serve as your online community where members can chat via text, voice, or video, and share files or media in different channels. Kind of like Slack or Whatsapp.
After you set up your server, there are a few things you’ll need to do:
Set up categories and channels – This is how you’ll organize your discussions into different spaces. For example:
A welcome channel to greet new members
A rules channel to set community guidelines
Topic-specific channels based on your niche (fitness, gaming, business, etc.).
Set your server to “Invite Only” – This ensures only paying members can access your community.
Create an invite link and set it to never expire, so you don’t have to create new links for every new member that signs up.
Once your server is set up, it’s time to connect it to your website and start charging for access!
Step 2: Connect Your Website to MemberSpace
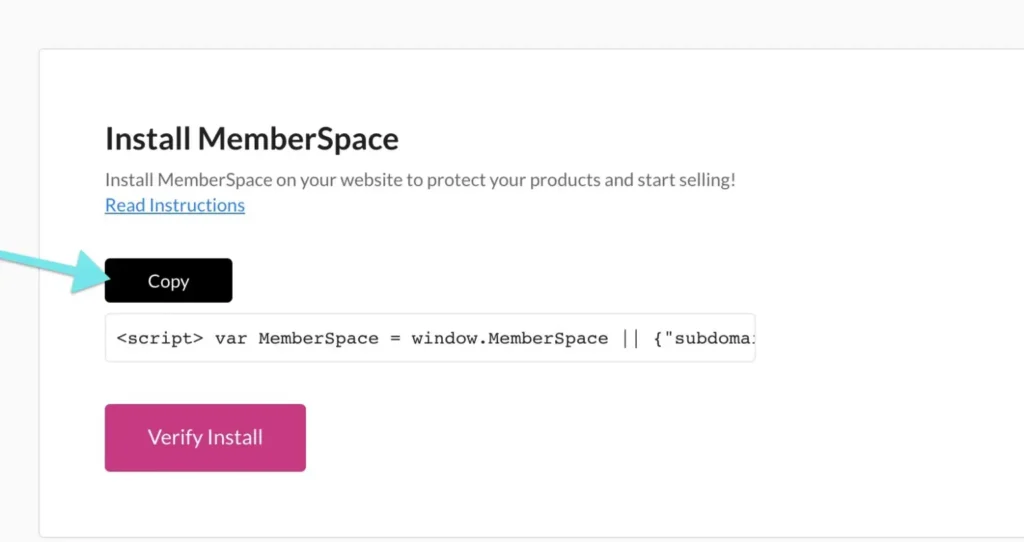
To accept payments for your paid Discord server, you’ll need to create a MemberSpace account for free and install it on your website. This is the tool you’ll use to add a signup form to your site and charge members for access to your server. It takes just a few minutes to add the snippet of code and works with any CMS!
Step 3: Add Your Discord Server to MemberSpace
Now, let’s link your Discord server to MemberSpace so only paying members can join.
Here’s what to do:
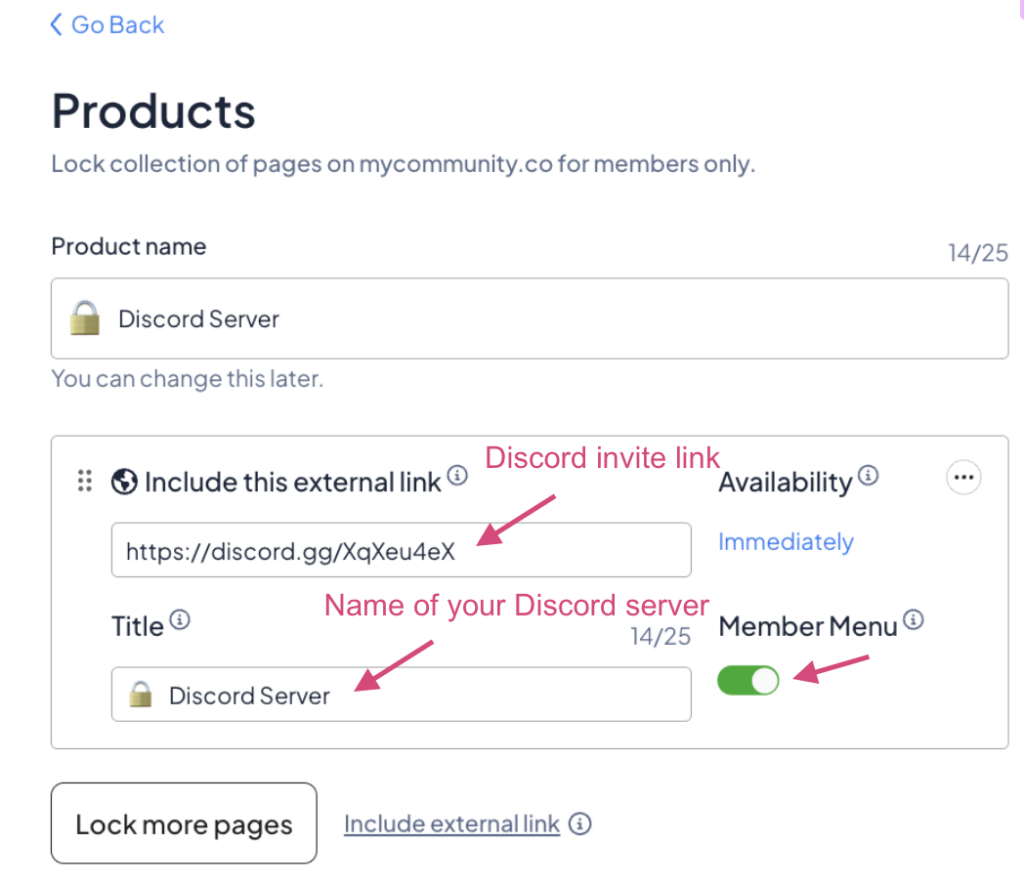
Go to your MemberSpace dashboard, create a new Product, and name it whatever you are calling your Discord server.
When it asks you to lock a page, click include external link and paste your Discord server invite link.
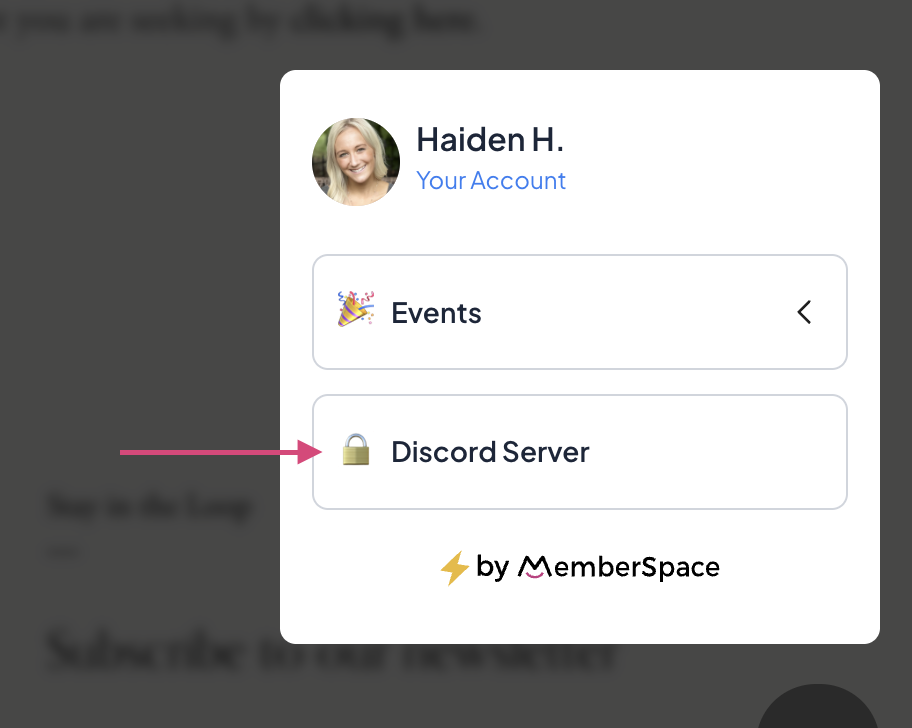
3. Enable the Member Menu option — this adds a floating button to your website, allowing members to easily sign up, login, and access the link at any time.
That’s it! Now, when someone signs up, they’ll have a seamless way to join your private server.
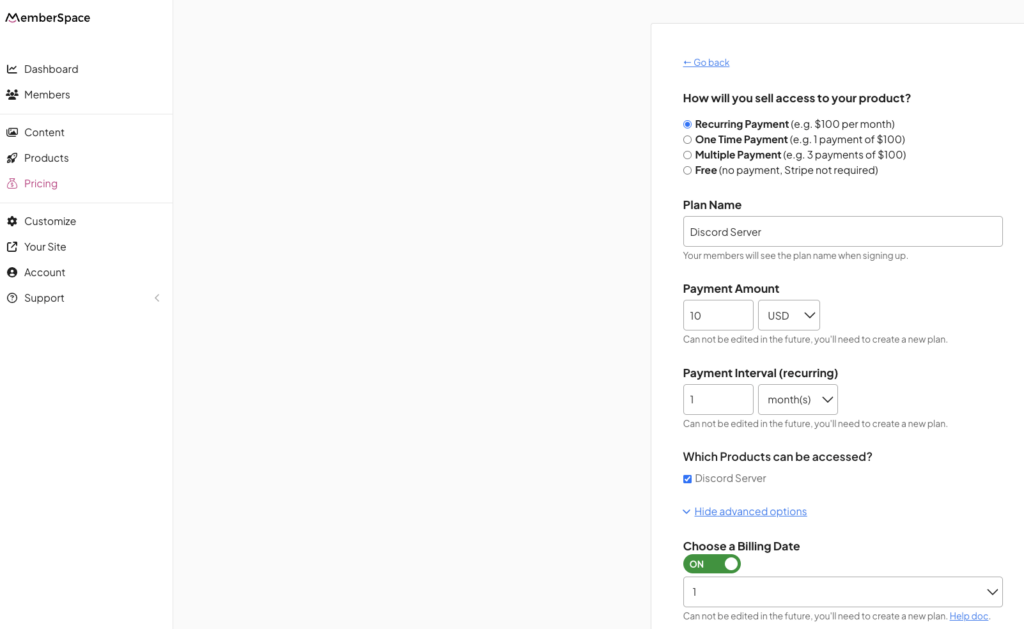
Step 4: Set a price for your subscription
MemberSpace allows you to easily charge your members for access to your paid Discord server right from your website. Just go to Pricing in your dashboard and set all the billing details — the type of payment (one-time, recurring, free, etc), payment frequency, billing date, etc.
You can also enable Google Pay and Apple Pay to make checkout even easier!
Step 5: Automate New Member Invites
As soon as members sign up and pay on your website, they’ll be able to join your paid Discord server through the Member Menu by clicking the invite link.
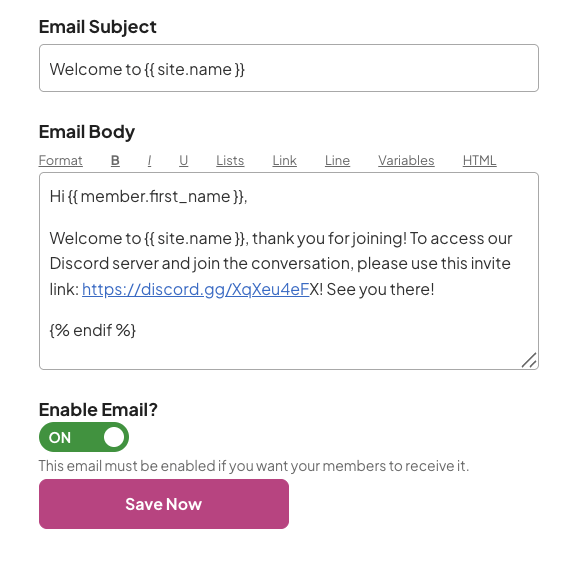
But to make sure every new member gets the link right away, you can also send an automated welcome email with MemberSpace’s Member Messages feature.
Here’s how to set it up:
Go to your MemberSpace dashboard.
Navigate to Customize > Notification Emails.
Select Add Welcome Email per Plan and include the Discord invite link.
This way, your new members will have multiple ways to access your server — no more chasing down DMs or manually sending out invites!
Tips for Managing Your Paid Discord Server
Once your paid Discord server is up and running, here are a few ways to keep it organized and running smoothly:
Monitor who joins your server Since Discord invite links can technically be shared, it’s a good idea to check your member list every so often and remove anyone who hasn’t paid. This helps keep your community exclusive to paying members.
Define member roles and permissions Decide what each type of member can access, who they can tag, and what they can manage.
Offer multiple pricing tiers With MemberSpace, you can set up different membership tiers, so after you launch, consider adding a premium plan with extra perks like:
Access to exclusive virtual events
Private Q&A sessions
VIP-only content or resources
Add a rules channel Set clear community guidelines from the start by creating a rules channel. This helps keep things organized, respectful, and enjoyable for everyone.
Customize your server with apps, integrations, and bots Discord has tons of built-in features to help you manage and grow your community. Some ideas:
Use a moderation bot (like MEE6 or Dyno) to automate rule enforcement
Add a polling bot to get feedback from members.
Integrate YouTube and other platforms to connect your Discord with your other content.
Final Thoughts
Setting up a paid Discord server is a great way to build a thriving, members-only community. And with MemberSpace, you can charge for access, automate invites, and even offer other exclusive content (like courses, newsletters, or bonus resources) alongside your paid Discord server!
Launch a paid Discord server!
The easiest way to accept membership payments or one-time charges for digital products like communities, online courses, content libraries, and more — all from your own website!