Haiden Hibbert
Imagine waking up to a notification that someone just purchased one of your meal plans—while you were still asleep. Selling meal plans online can turn your passion for healthy living into a steady passive income stream.
Yes, the nutrition coaching market is crowded—but that’s not necessarily a bad thing. It means people are actively looking for solutions like yours. The key is finding your unique angle, and with the right strategy, you can do exactly that. In this post, I’ll show you how to focus on what sets you apart, package your meal plans, and launch your products in just five simple steps.
By the end, you’ll have a clear plan to confidently sell your meal plans and grow your business. Let’s get started!
Start selling meal plans!
The easiest way to accept membership payments or one-time charges for digital products like online courses, communities, content libraries, and more — all from your own website!
Get started for free! 5 minutes to set up.
Table of Contents
Step 1: Find Your Niche
Here’s the truth: if you try to sell your meal plans to everyone, you’ll sell them to no one. The secret to standing out in a crowded market is to get super clear on who you’re helping and what makes your plans unique.
Think about your ideal customer. Are your meal plans for:
- Busy Professionals who barely have time to cook?
- Postpartum Moms juggling sleepless nights and self-care?
- Special Dieters like vegans or people with food allergies?
- Athletes who want meal plans to fuel their training and recovery?
The more specific you are, the easier it is to connect with your audience.
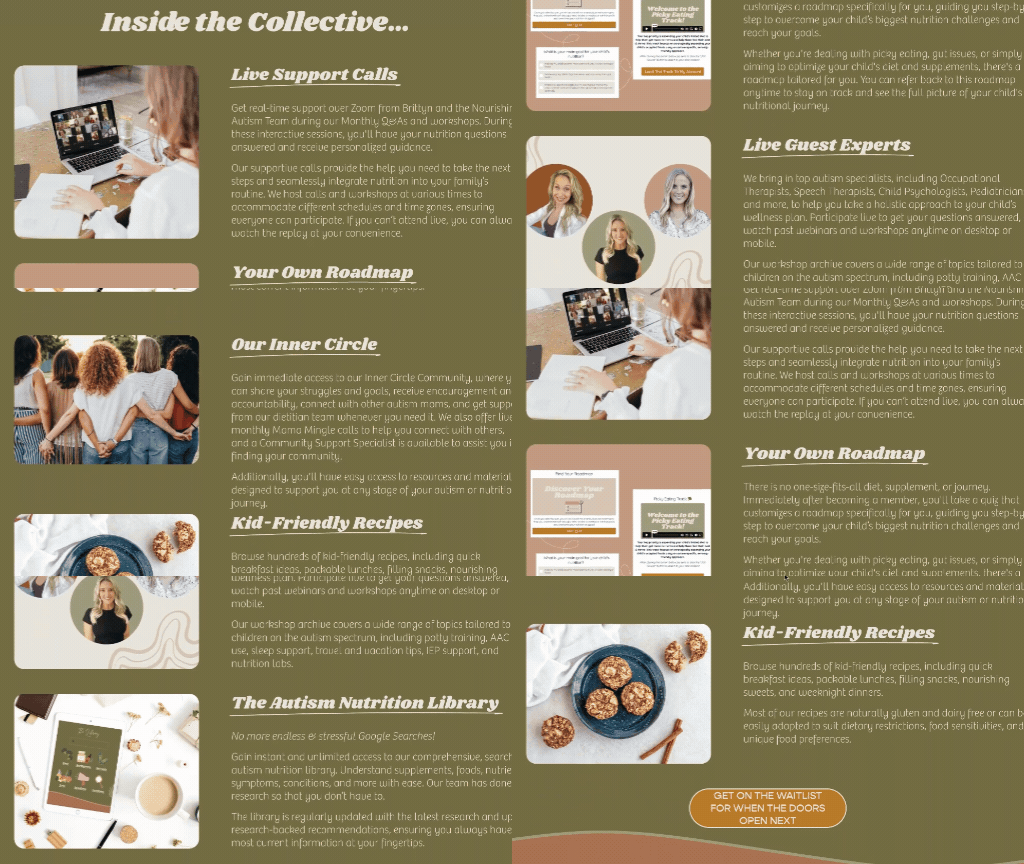
Here’s an example. Brittyn from the Nourishing Autism Collective started her meal planning and nutrition membership to help parents of children on the autism spectrum make meaningful changes to their diets. Growing up with an autistic brother gave her a unique perspective, which shaped the way she serves families through her business. By focusing on this specific audience, she’s built a supportive community and profitable membership.

Step 2: Package your Meal Plans
Now that you know who you’re helping, it’s time to figure out how to deliver your meal plans in a way that works for your audience. Whether it’s a simple download or a full membership, the goal is to make your content feel easy to use and valuable.
Here are a few ways you could package your plans:
- eBooks or guides: Perfect for one-time purchases like a 7-day plan or recipe collection.
- Programs: A structured 6- or 12-week plan to help clients hit a specific goal, like better meal prep or weight loss.
- Content Libraries: Think of this as a membership where clients get ongoing access to your recipes, meal plans, and resources.
- Personalized Plans: Custom plans paired with 1:1 coaching or feedback for those who want more hands-on support.
You can also offer multiple tiers to give your customers options and reach more people. For example:
- Basic Tier: Access to pre-made meal plans for the DIY crowd.
- Middle Tier: Everything in the basic tier, plus extras like group coaching or live workshops.
- Premium Tier: Adds personalized membership plans, 1:1 coaching, or other premium services for those who want a little extra.
Tiers are a win-win—they let you cater to different budgets and needs while making it easy for customers to upgrade as they see the value in what you offer.
Step 3: Add Your Meal Plans to Your Website
Now that you know what you’re selling, it’s time to add your meal plans to pages on your website. If you don’t have a website yet, platforms like Squarespace make it easy to set one up with customizable templates.
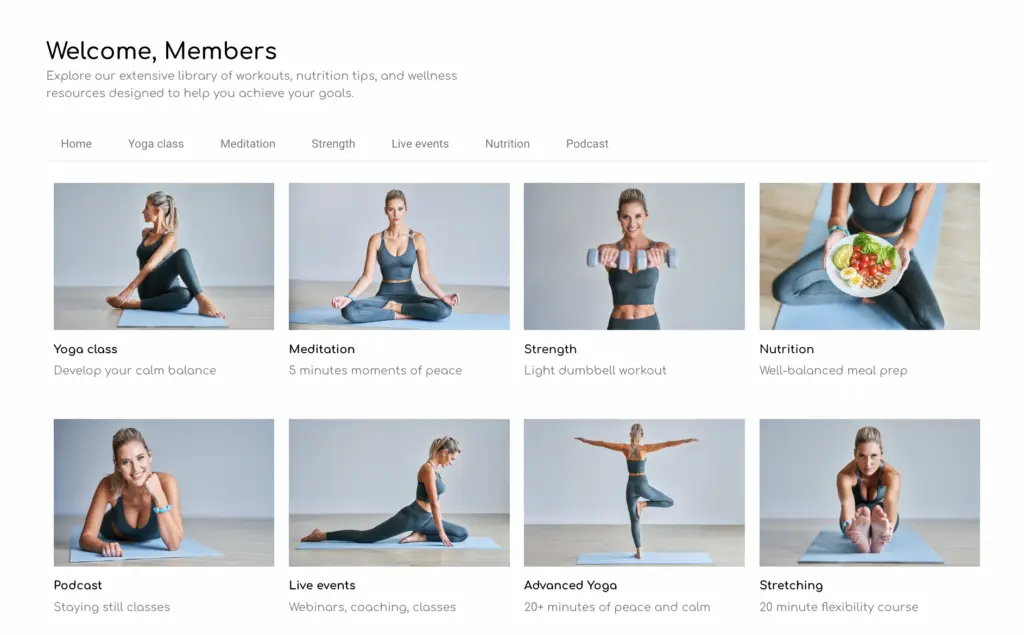
Create dedicated pages for your meal plans, recipes, and any additional resources. These will be the pages your customers access after signing up. Keep it simple and organized—you can structure these pages however works best for your content and audience.
In the next step, we’ll make these pages accessible only to paying customers by locking them behind a paywall.
Step 4: Lock Your Pages for Clients Only
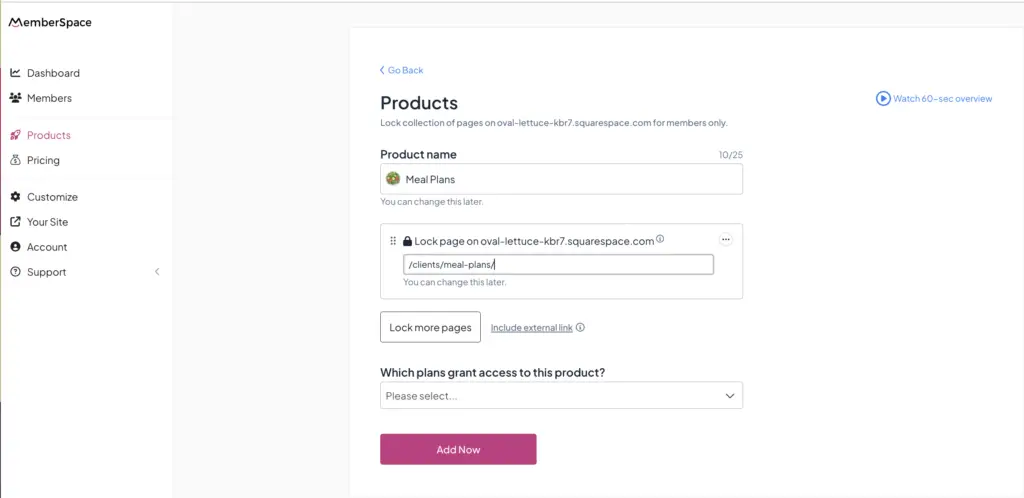
Once your content is uploaded, it’s time to make sure only paying customers can access it. Using MemberSpace, you can lock the pages you created so they’re protected behind a paywall.
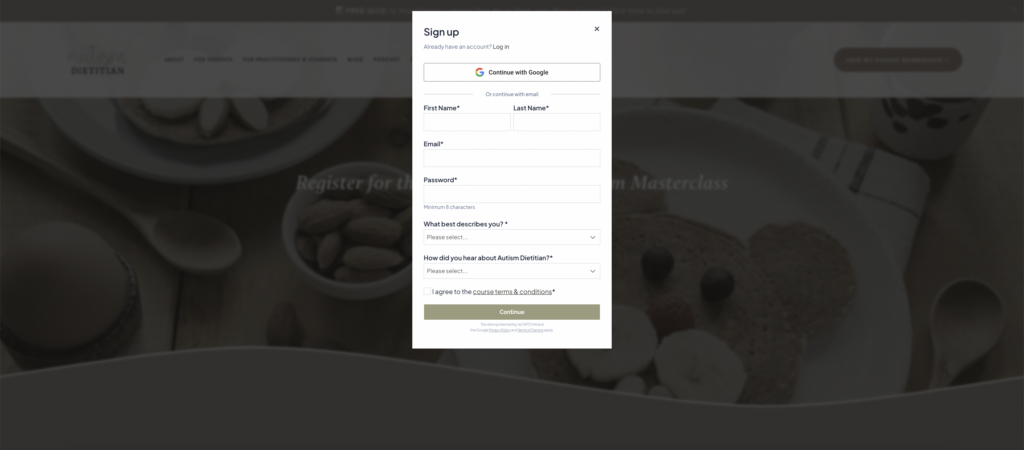
When someone tries to view a locked page, they’ll be prompted to sign up and pay first. MemberSpace automatically creates a signup and payment form for you, which you can customize to match your branding for a seamless experience.
Step 5: Set Up Your Pricing
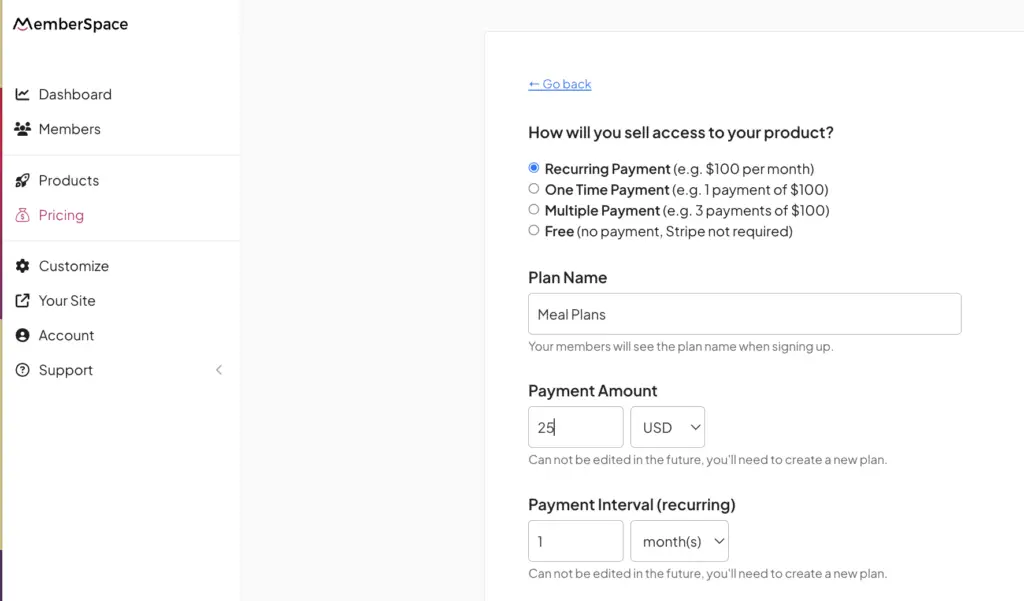
Now that your website pages are locked, it’s time to set up pricing with MemberSpace. Here’s how it works:
- Create your pricing plans. MemberSpace lets you set up one-time payments, subscriptions, free trials, and even installment options for higher-priced plans.
- Grab your signup links. Once your plans are set, MemberSpace automatically generates unique signup links for each one.
- Add the links to your site. Drop these links into your website buttons—like “Get Started” or “Access Now”—so customers can easily sign up and pay.
And just like that, your site is ready to take payments and give customers instant access to your meal plans. It’s straightforward, seamless, and saves you a ton of time.

Frequently Asked Questions
Can you make money selling meal plans?
Absolutely! Selling meal plans is a great way to earn passive income. Once you’ve created your plans, they can sell over and over again with minimal additional effort. By pairing your expertise with the right pricing and tools like MemberSpace, you can scale your business and create consistent revenue.
How much should I charge for a nutrition plan?
It depends on the value you’re offering and your audience. Basic meal plans often sell for $25–$50, while more personalized plans or packages with coaching can range from $100–$500 or more. It’s always a good idea to research what others in your niche are charging and adjust based on your experience level and the uniqueness of your offering.
Can I sell meal plans without being a licensed nutritionist?
Yes, but it’s important to be mindful of your local regulations. If you’re not a licensed dietitian or nutritionist, focus on general wellness plans that emphasize balanced eating and healthy habits.
How do I sell nutrition coaching?
Combine your meal plans with personalized coaching sessions to provide extra value. You can offer packages that include 1:1 guidance, meal plan adjustments, and ongoing support. MemberSpace makes it easy to lock exclusive coaching materials behind a paywall and set up subscription plans for ongoing services.
Final Thoughts
Selling meal plans online is a great way to share your knowledge and help people make meaningful changes while building a flexible business. You don’t need to have all the answers upfront—start with what you know, keep it simple, and let tools like MemberSpace handle the technical side so you can focus on your content and customers.
The best part is, you can adapt as you go! Start small, experiment with what works, and let your business grow with you.
If you’re ready to dive in, check out our free workshop to learn how to set up your website, protect your content, and start selling.
Start selling meal plans!
The easiest way to accept membership payments or one-time charges for digital products like online courses, communities, content libraries, and more — all from your own website!
Get started for free! 5 minutes to set up.

